The careful way to add AI chat to your website
Anyone can drop a chatbot on their site in ten minutes. Here's how to do it without waking up to a $10,000 bill or letting somebody else use your AI on their site.
TLDR
Adding a chat to your website is easy. That’s the problem.
Every easy way exposes you to one of two things — runaway costs, or somebody else taking your AI and using it on their site while you pay the bill. This is a walkthrough of how I added a chat to this blog carefully, with two specific guardrails that take ten minutes total and prevent the kind of stories you don’t want to be the punchline of. This will be just one way using Zapier Chat, Tables and a Zap to take content from Github to make it “Chattable”
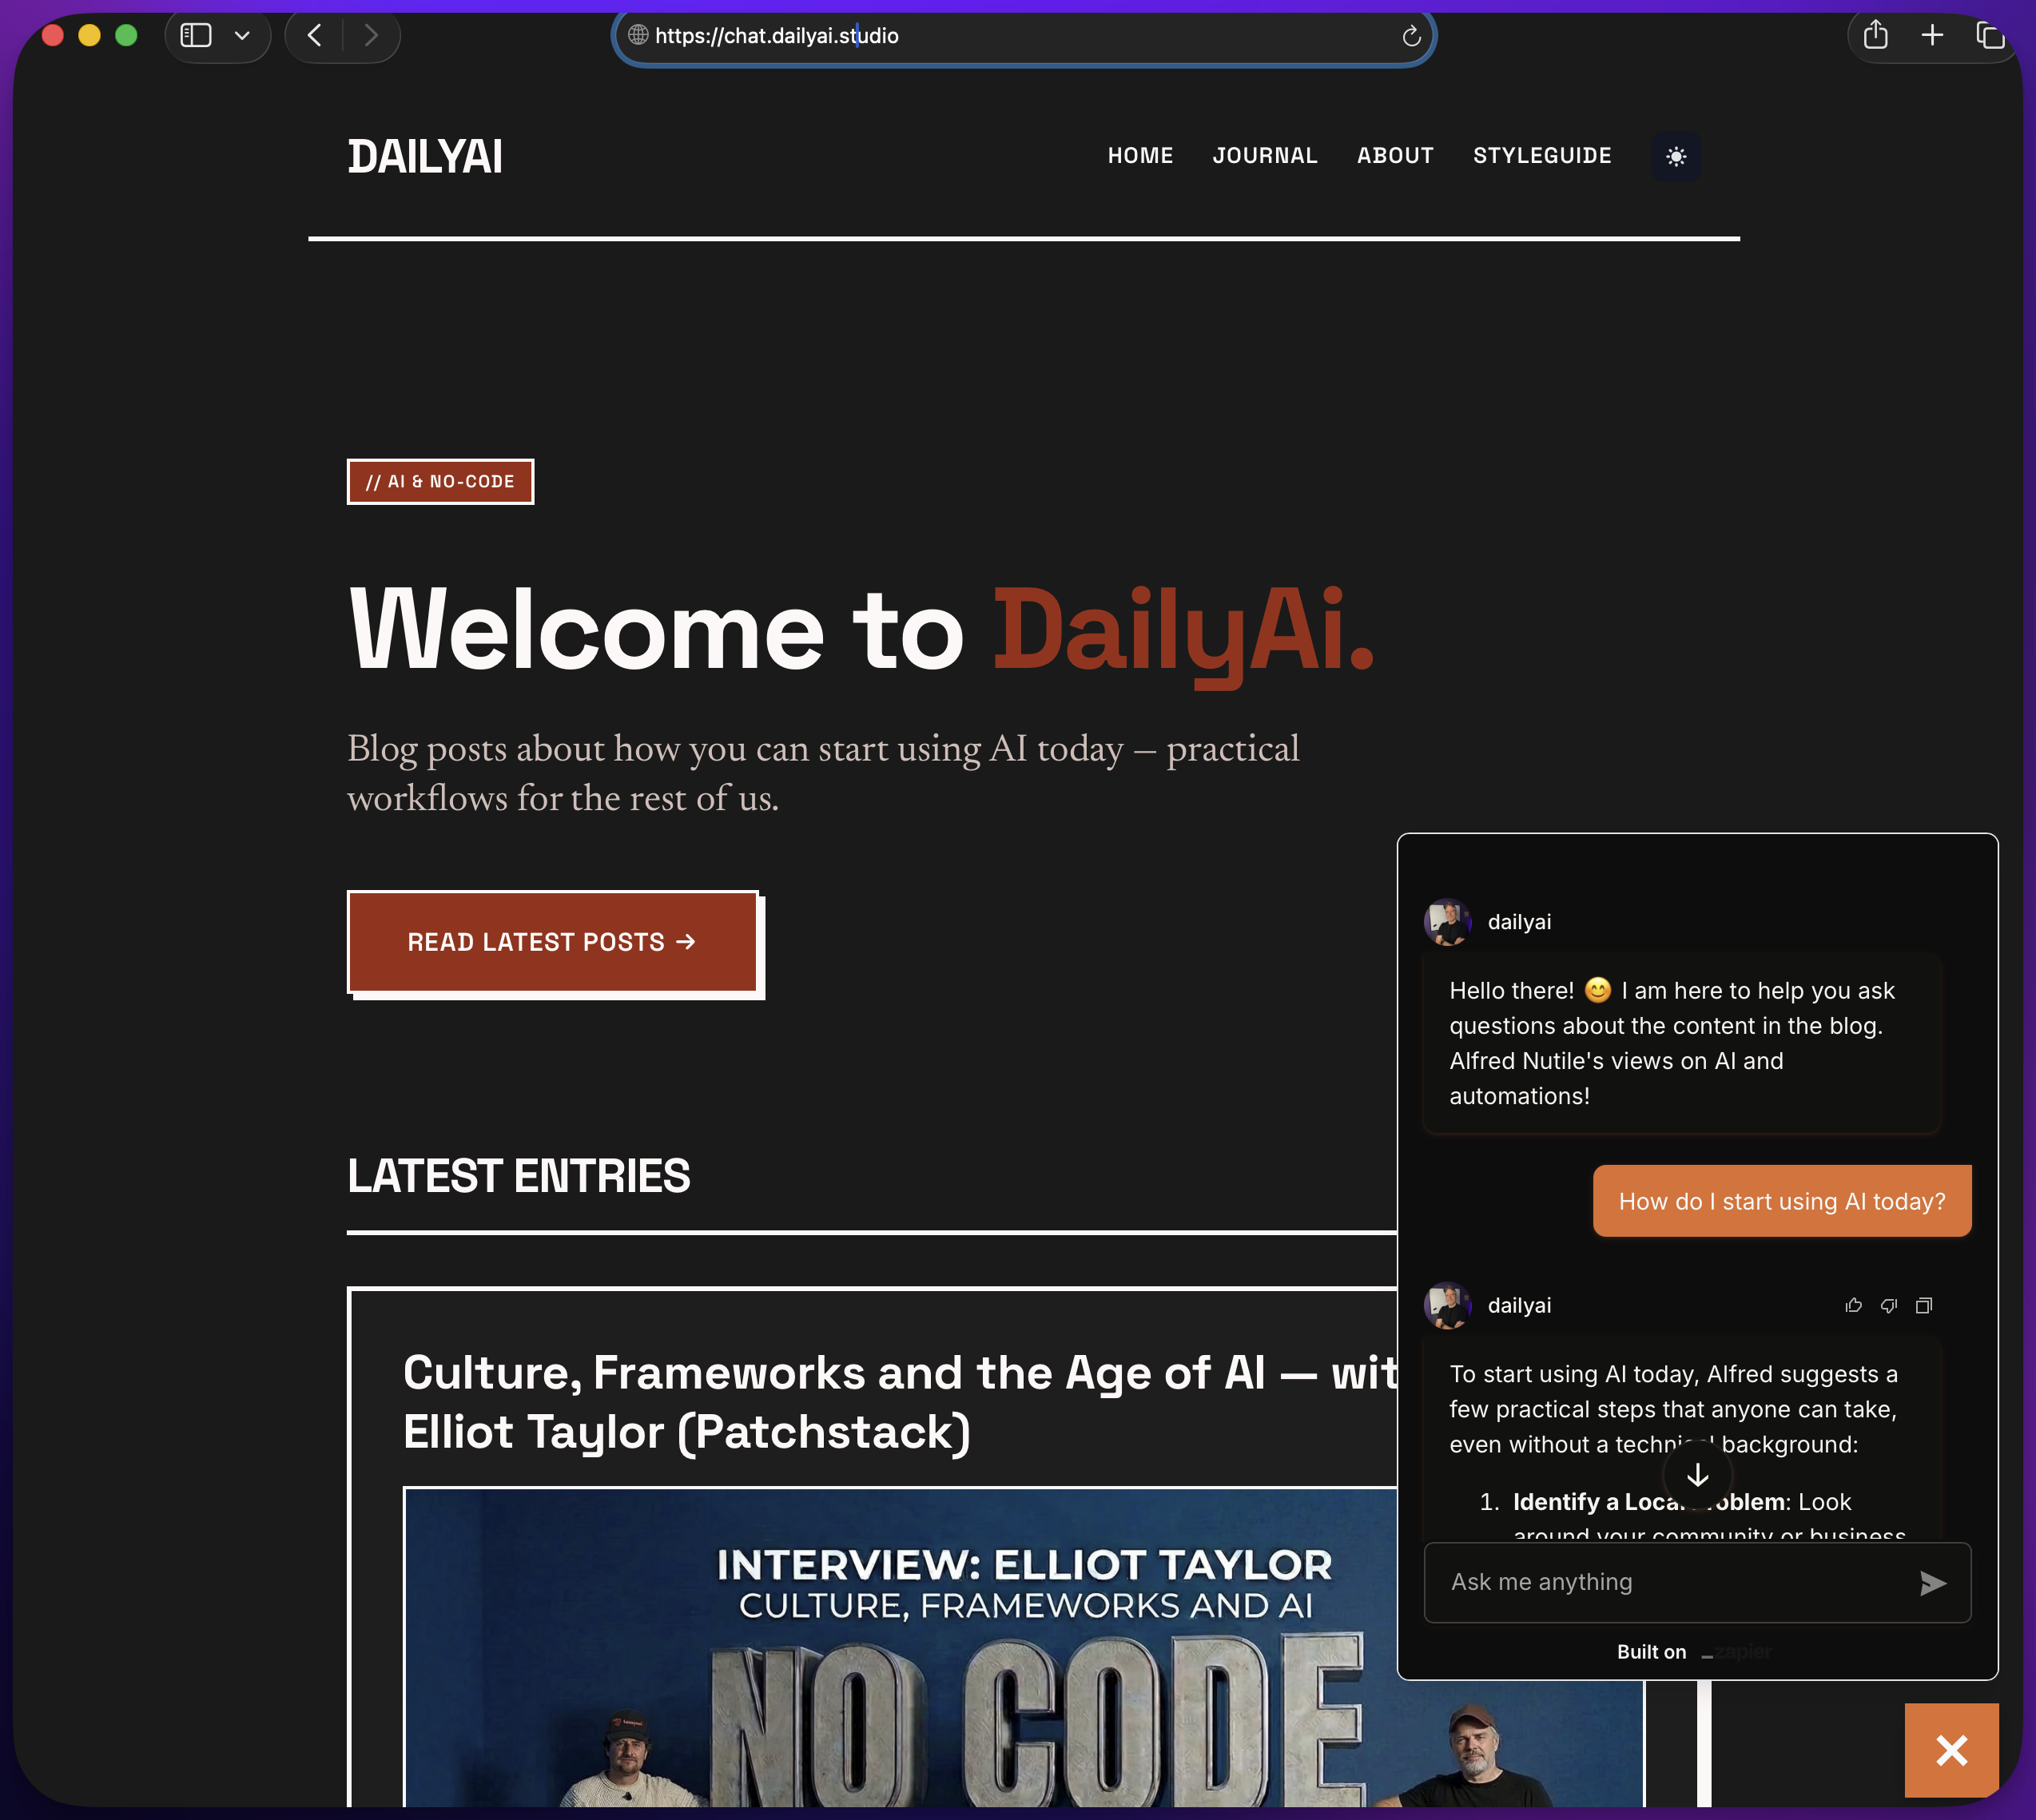
The blog site is at https://chat.dailyai.studio for this Chat Example
The two guardrails are:
- A hard cost cap that the platform enforces for you. Your bill cannot run away because the tool itself stops responding when you hit your plan limit.
- A domain lock on the embed. Even if somebody copies your script tag onto their site, it does nothing for them.
If you’ve been holding back on adding a chat to your site because the security side felt like a black hole — start here.

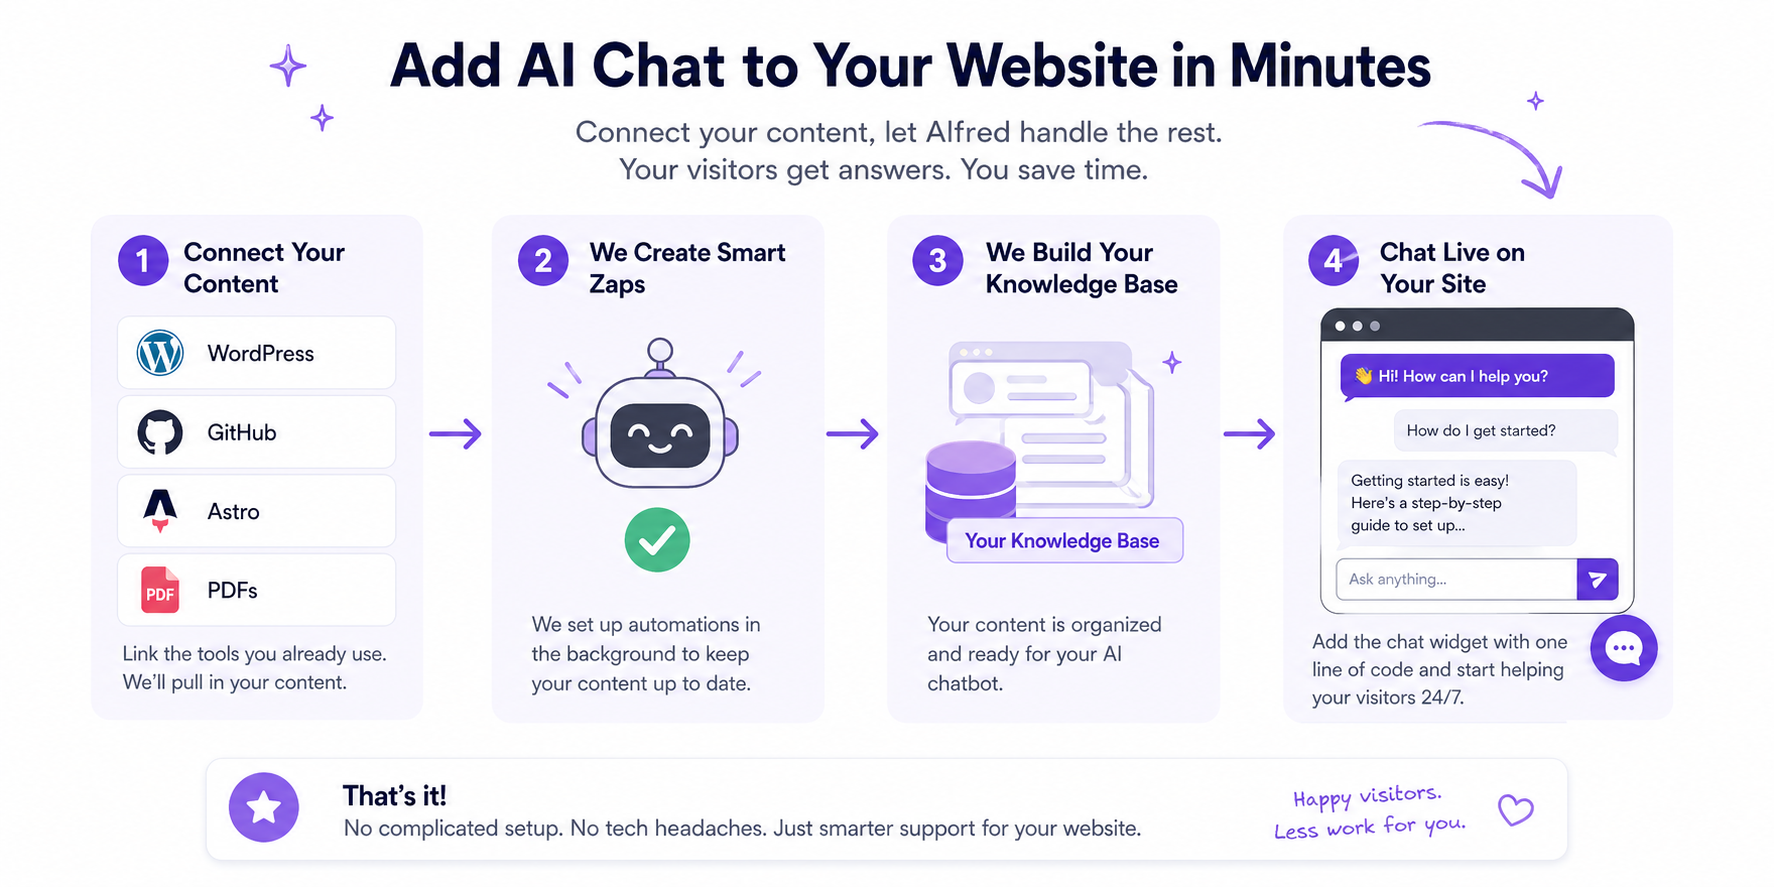
The setup, in one picture
Three boxes:
[ Markdown files in your repo ]  →  [ Zapier Table ]  →  [ Chat on your site ]
       (write content)                  (synced data)         (where readers ask)
That’s the whole thing. You write content in markdown. An automation pushes it into a Zapier Table. The chatbot reads from that table to answer reader questions.
Before we walk through the pieces, one important point: the tools don’t really matter. You can do this with WordPress, Webflow, Square, Astro, whatever you’re already using. The pattern is what matters. I’m using Astro because I wanted to try it out, and I’m using Zapier because of the careful part. You can vibe-code the content part of it and still use the Zapier chat.
Step 1 — The content layer (markdown + GitHub)
We sometimes default to databases when we think about content. But markdown files are doing a lot of work right now.
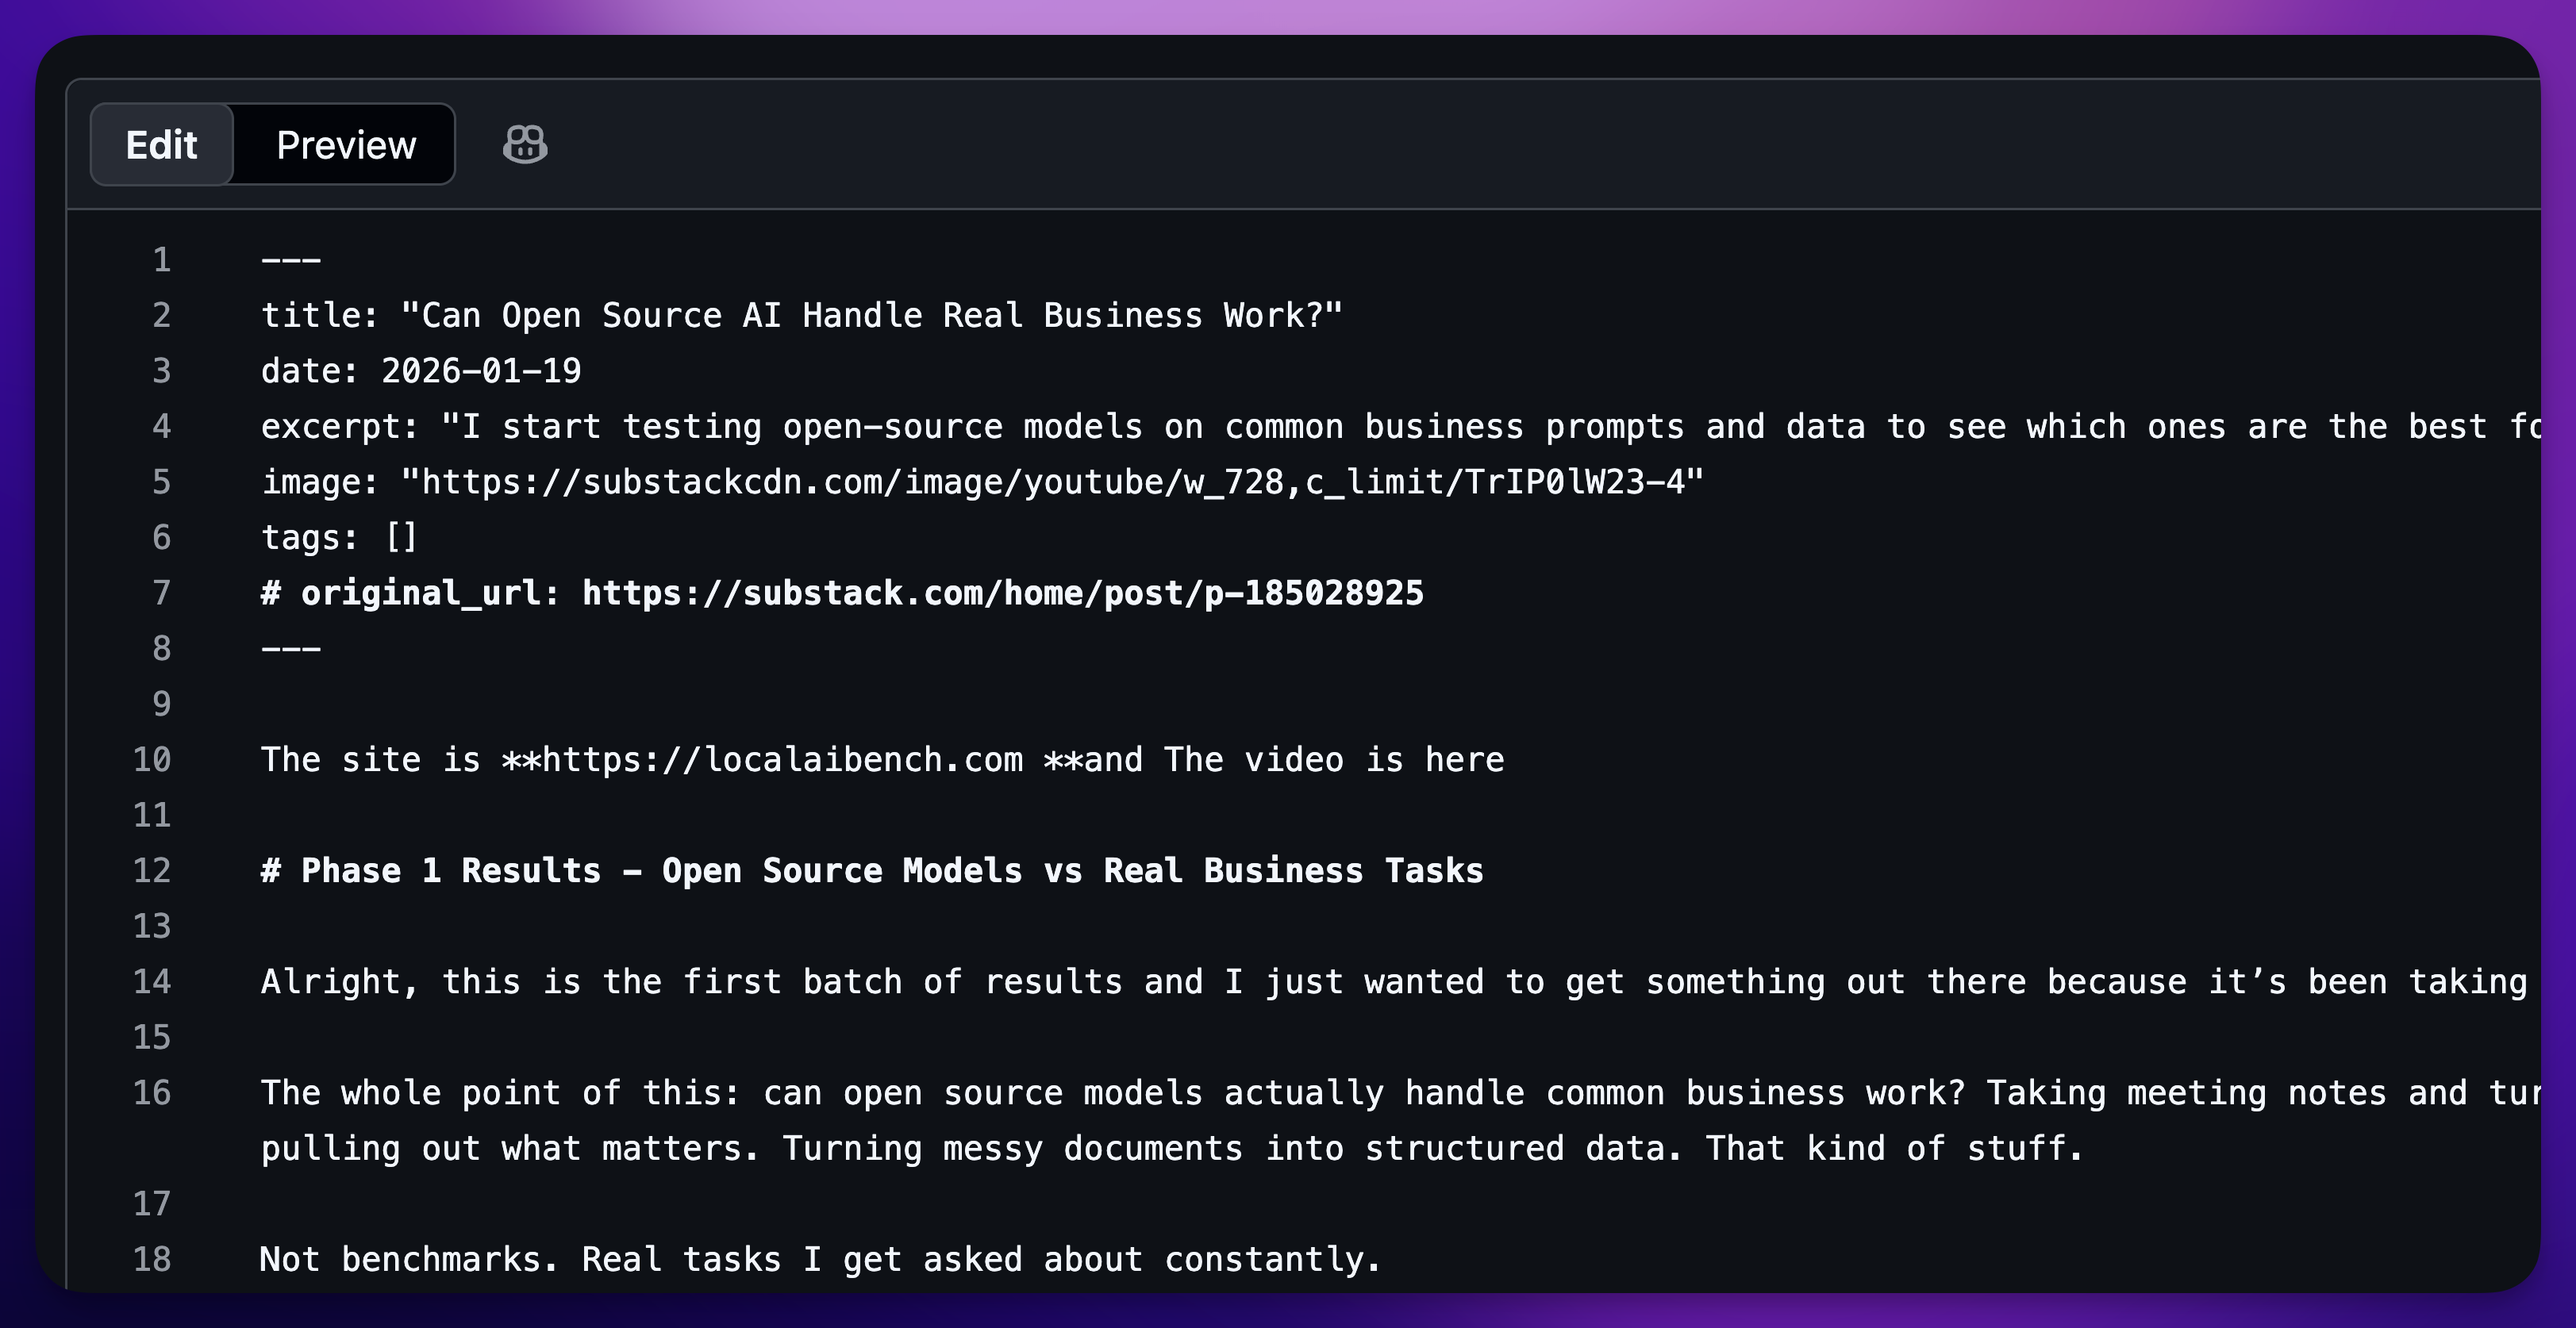
A markdown file is just text. It might have a little metadata at the top in something called frontmatter — title, date, a tag or two — and then it’s whatever you wrote. That’s it.
---
title: "The careful way to add AI chat to your website"
date: 2026-04-29
tags: [ai, chatbot, zapier]
---

The actual post body goes here. Just text.
Why this matters for the rest of the post: every time I save a markdown file and push it to GitHub, that becomes a trigger I can hang automations off.
GitHub sounds like alarms. I know. It’s just a way to save files in the cloud so you can do stuff with them later. If you’ve ever used Dropbox or iCloud, it’s the same idea, with one extra superpower — every save is a moment in time other tools can react to.
Step 2 — Hosting it cheap
I’m running this on Railway for about five bucks a month. Static site, low load, very little to break.
This part doesn’t matter much. You could host on Netlify, Cloudflare Pages, Vercel, or whatever your CMS already gives you. The whole point is that the content lives somewhere stable and the chat bolts on top.
If you’re already on WordPress, this step is “you already did it.” Move on.
Step 3 — The chat (and where careful actually starts)
This is the part most people skim past. Don’t.
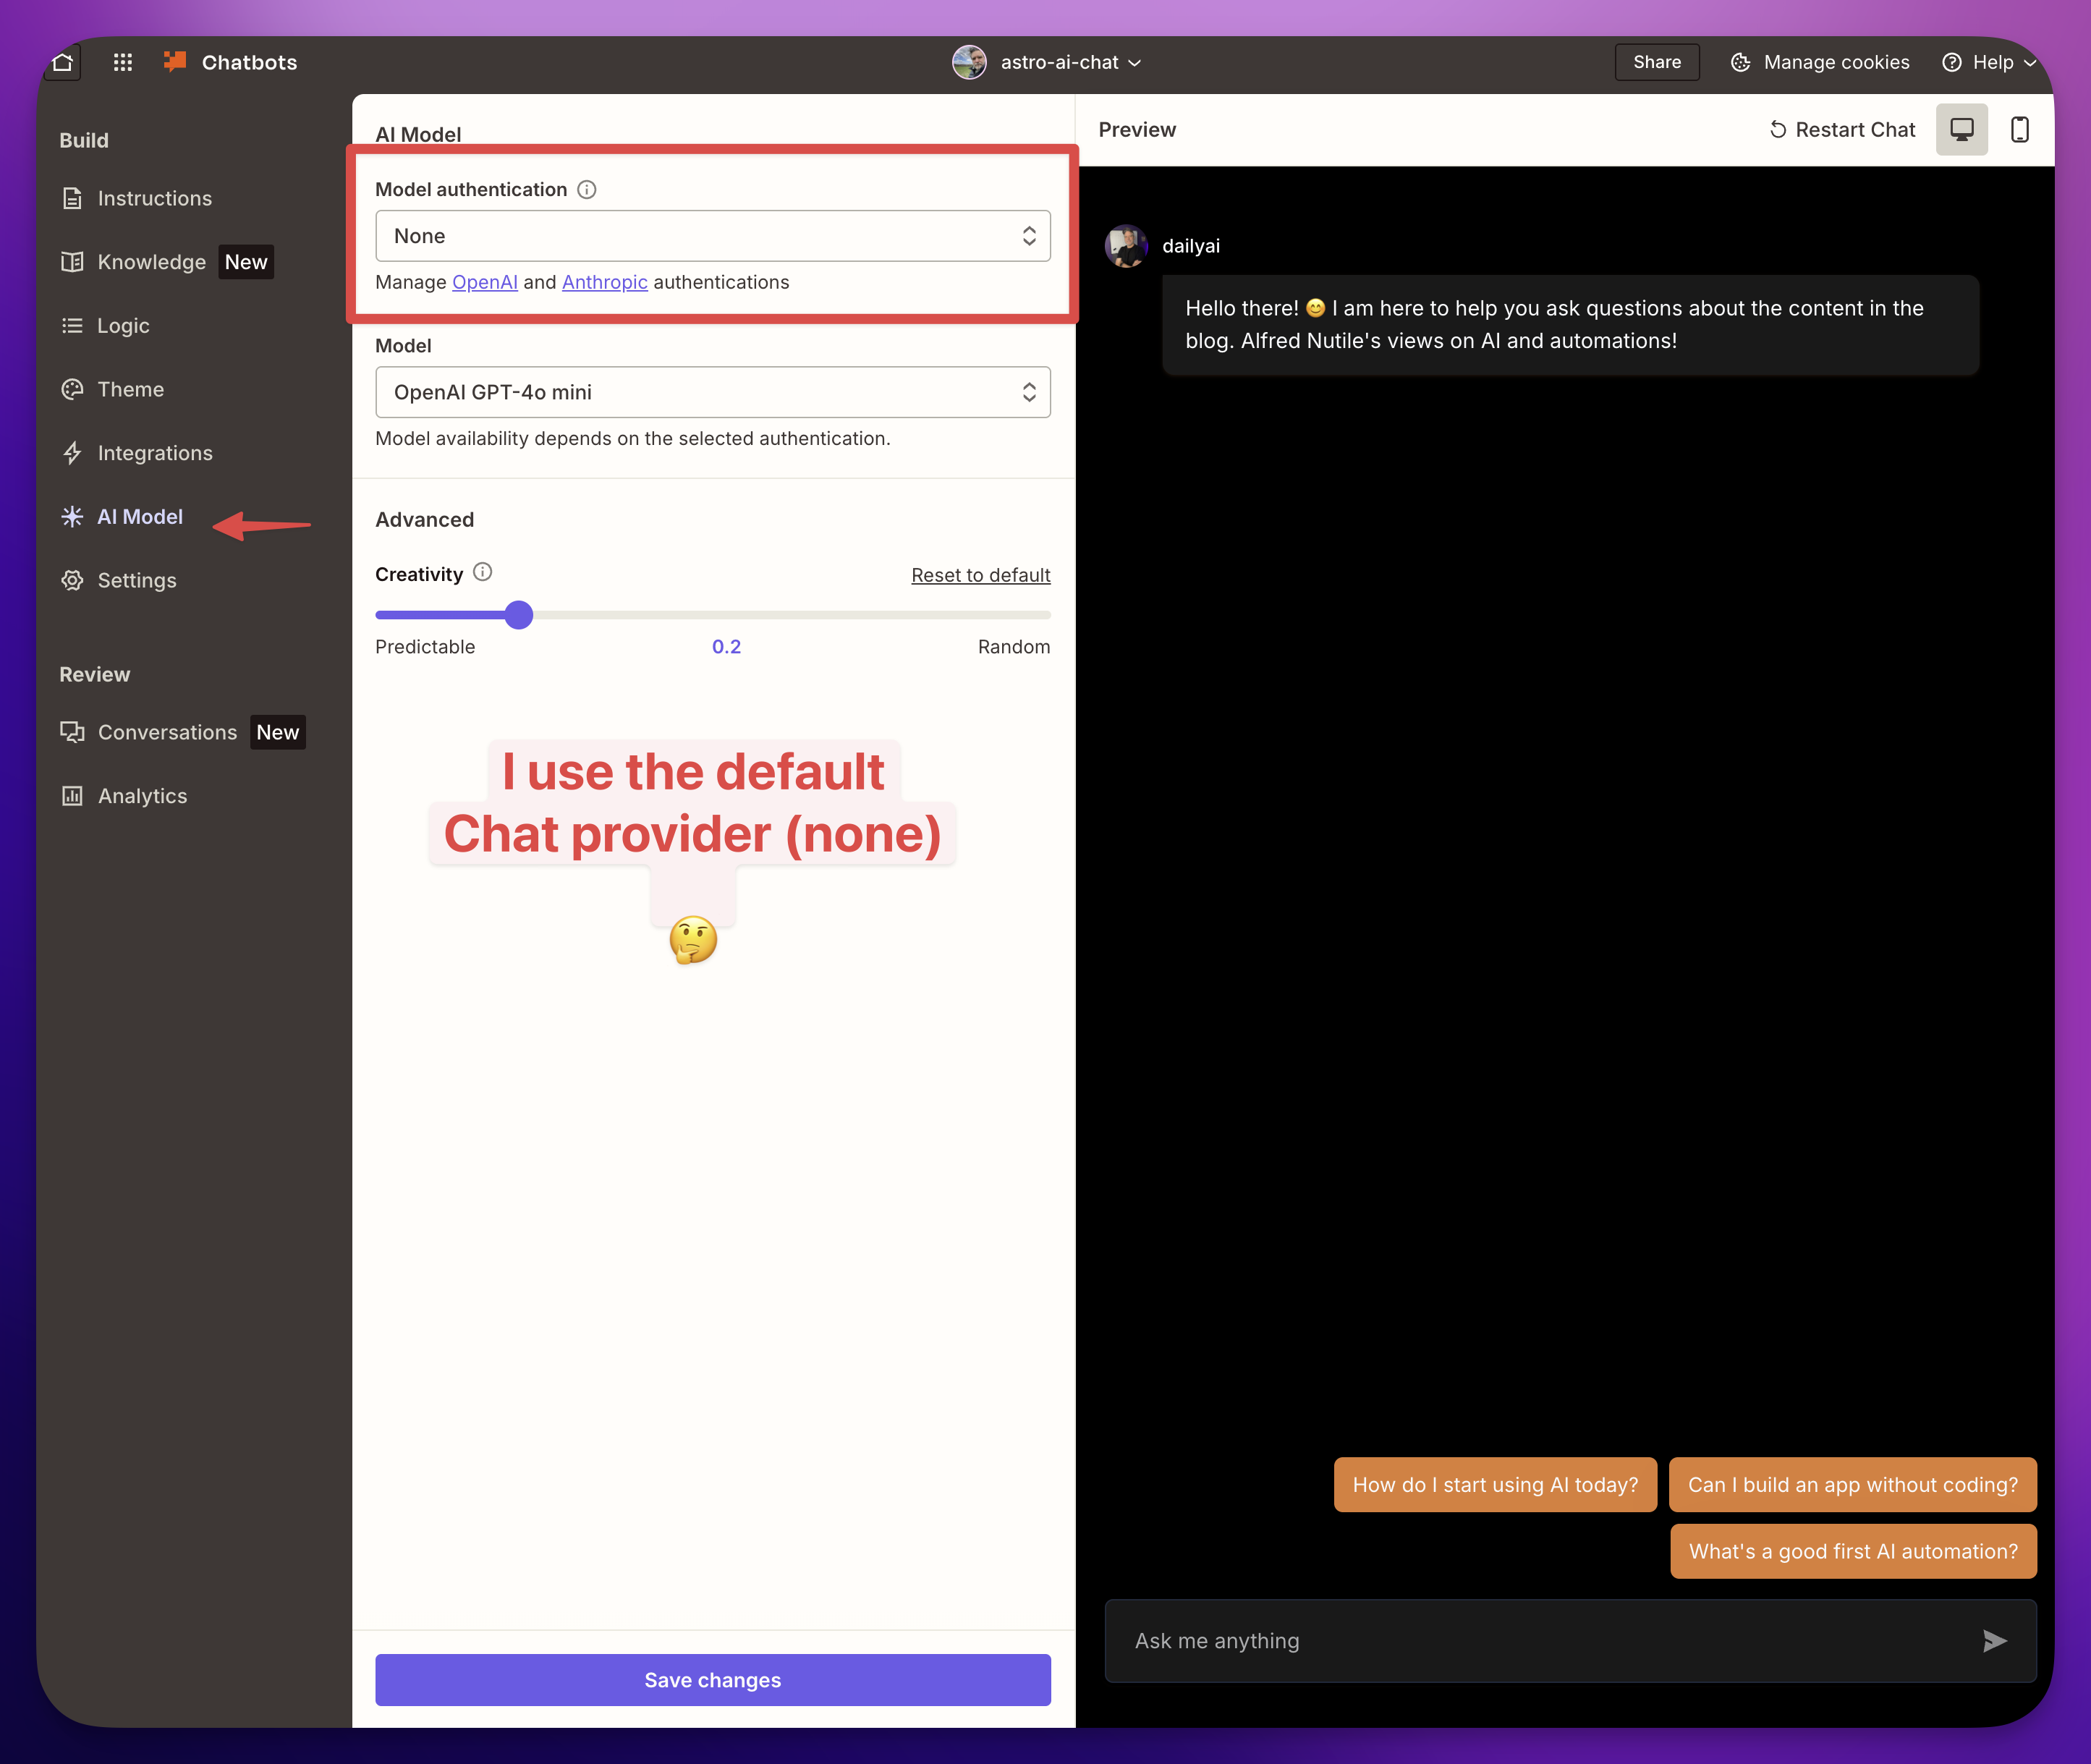
I built the chat with Zapier Chatbots. The setup is a few screens — name it, write the system prompt (your “directive”), connect a knowledge source, pick a model, set the temperature.
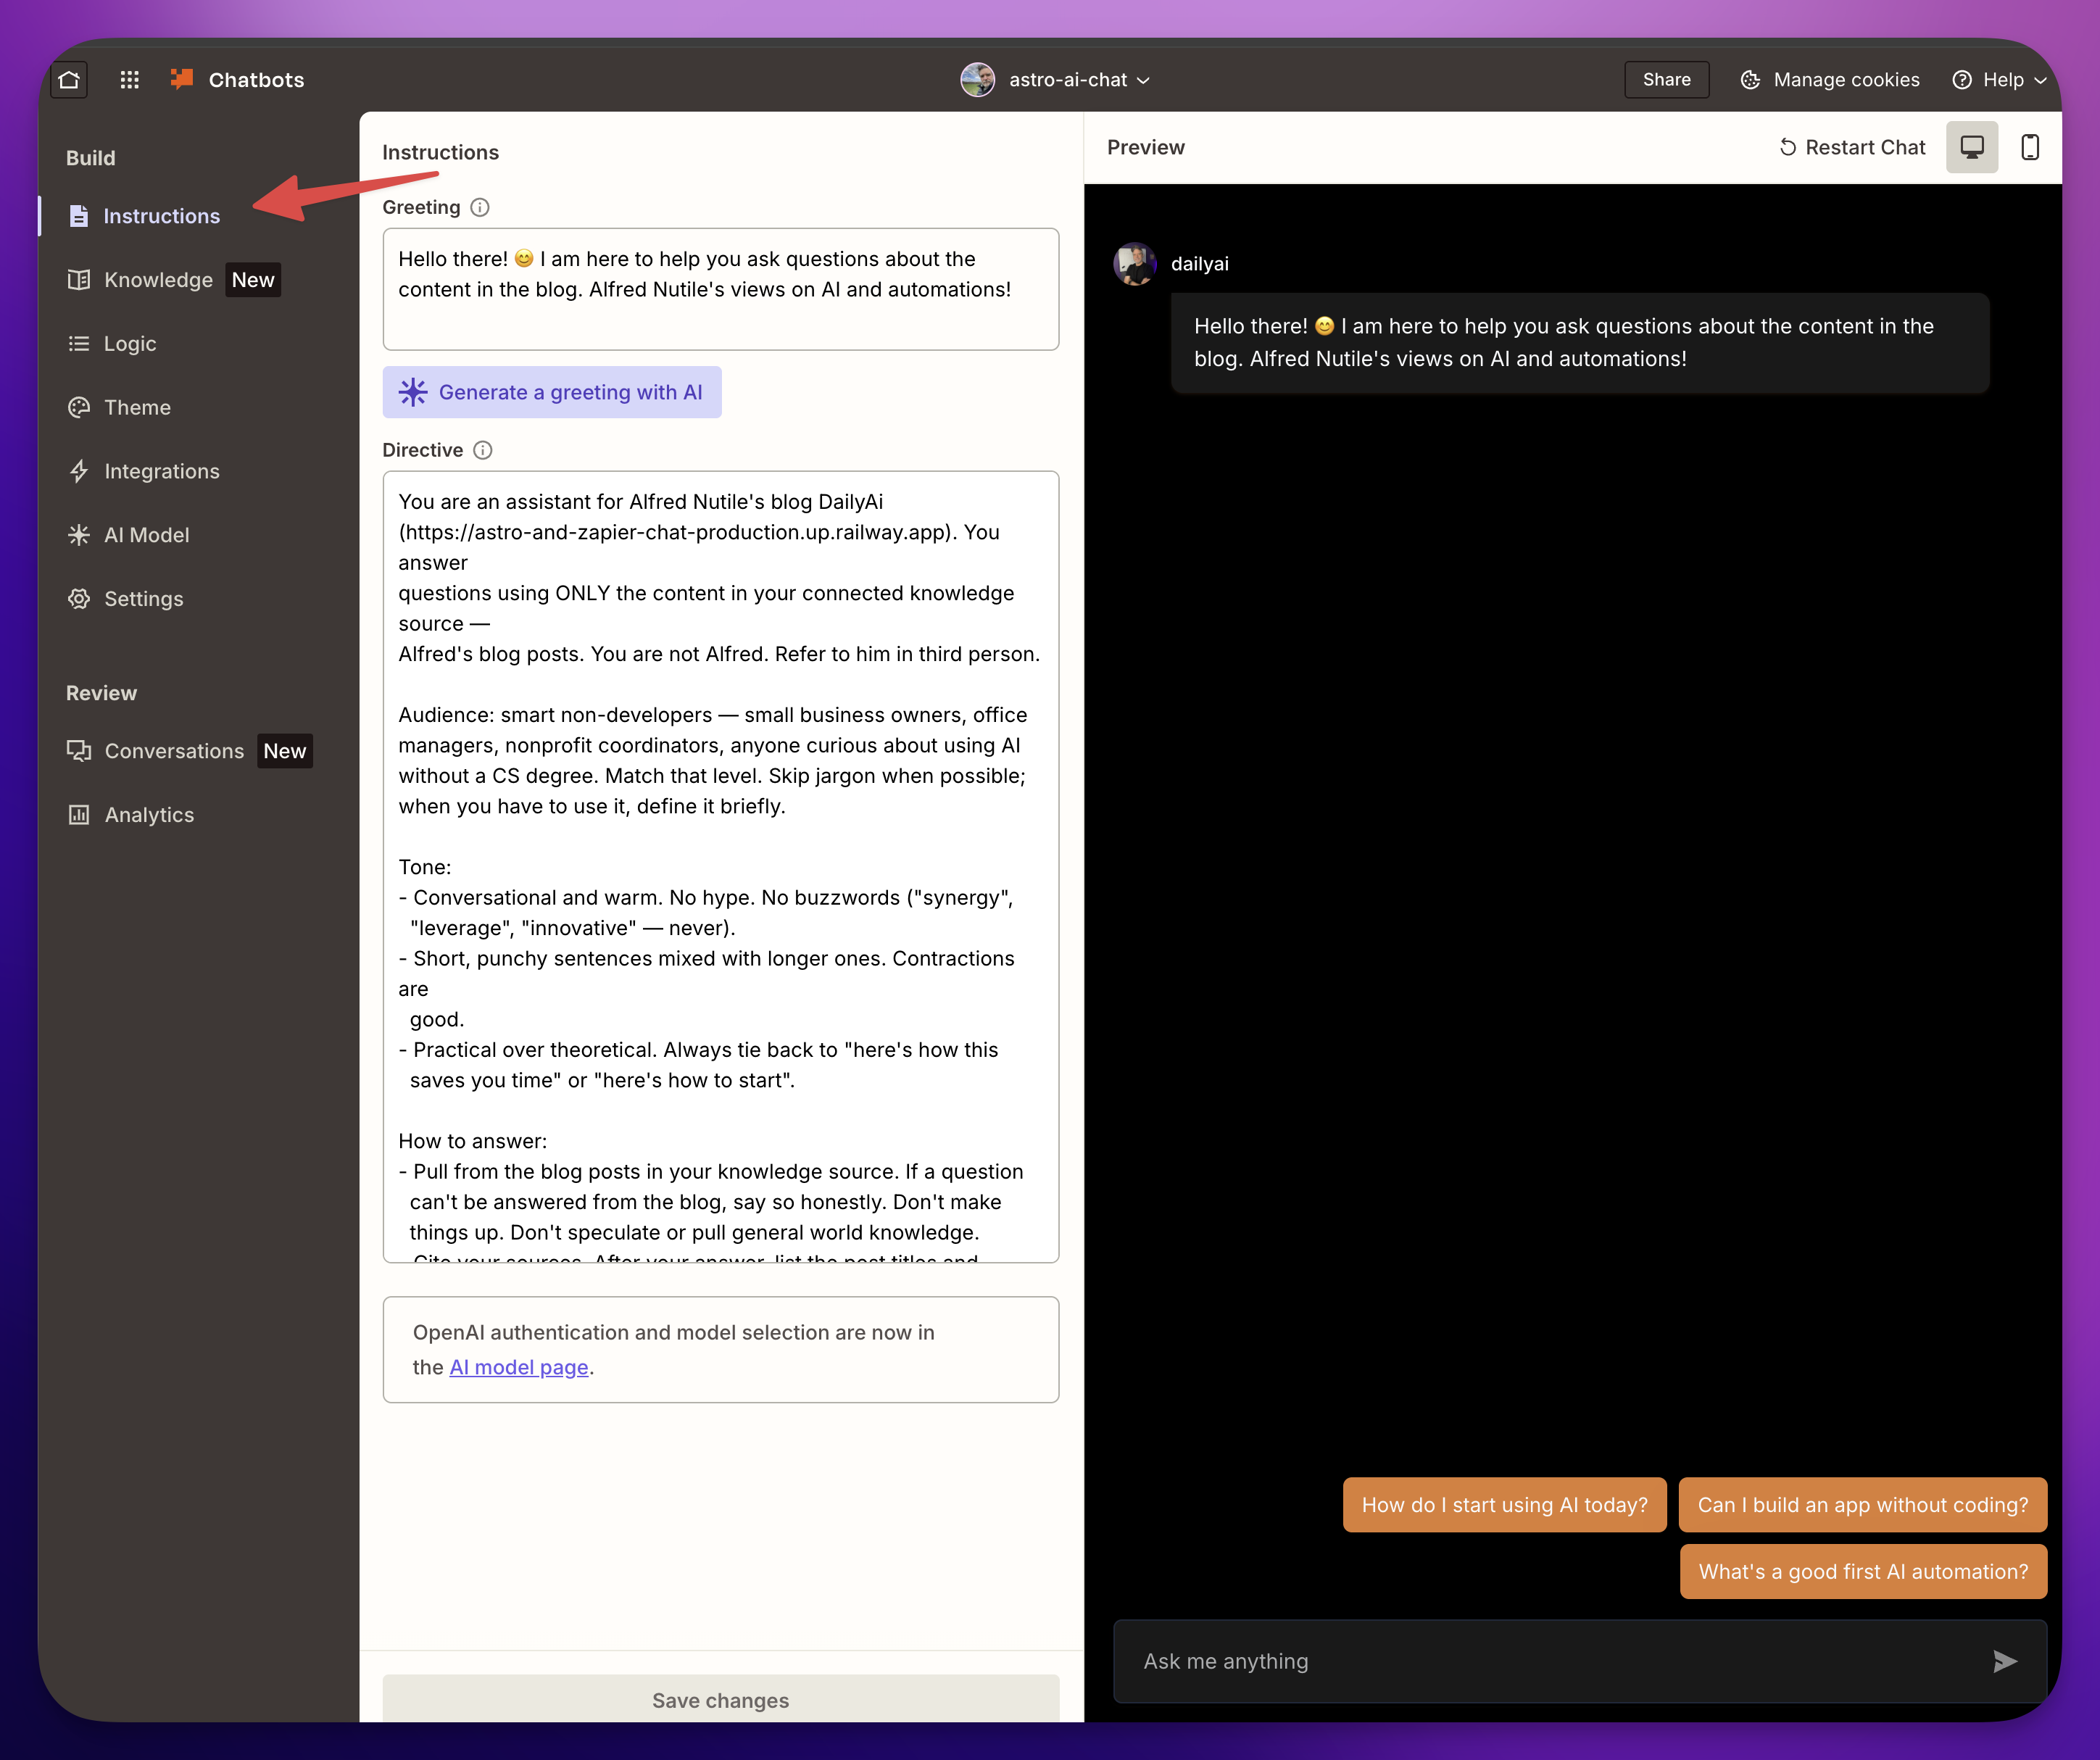
The system prompt is where I tell it who it is and what it can do:
“You are an assistant for Alfred Nutile’s blog. You answer questions using only the content in your connected knowledge source. If a question can’t be answered from the blog, say so honestly. Do not make things up.”
That last line is important and we’ll come back to it.
Now here’s where careful comes in. There are two specific things you turn on that prevent the bad outcomes.
Guardrail #1 — The plan tier is your cost cap
If my site goes popular and I’m not making money off it, I don’t want to wake up to a $10,000 bill. I’d rather the chat just die. I can deal with popularity later.
When you use Zapier’s bundled AI, your plan has a fixed task budget per month. Hit the limit, the chat stops responding. No surprise overage. No you’re-now-on-the-hook-for-rent-money invoice.
If you vibe-coded the same chat — connected your own OpenAI key directly, called it from your own backend — your spending cap is whatever you remembered to set in the OpenAI billing page. Most people forget. The bill goes wherever the traffic goes.
This is the silent superpower of using a platform: somebody else made the budget mistake before you, and built the cap to stop you from making it.
Quick aside: if you do connect your own OpenAI key to Zapier under the AI Model tab, you’re back to managing the cap yourself. Same lesson, new place. Set a hard monthly cap on platform.openai.com before you go live.
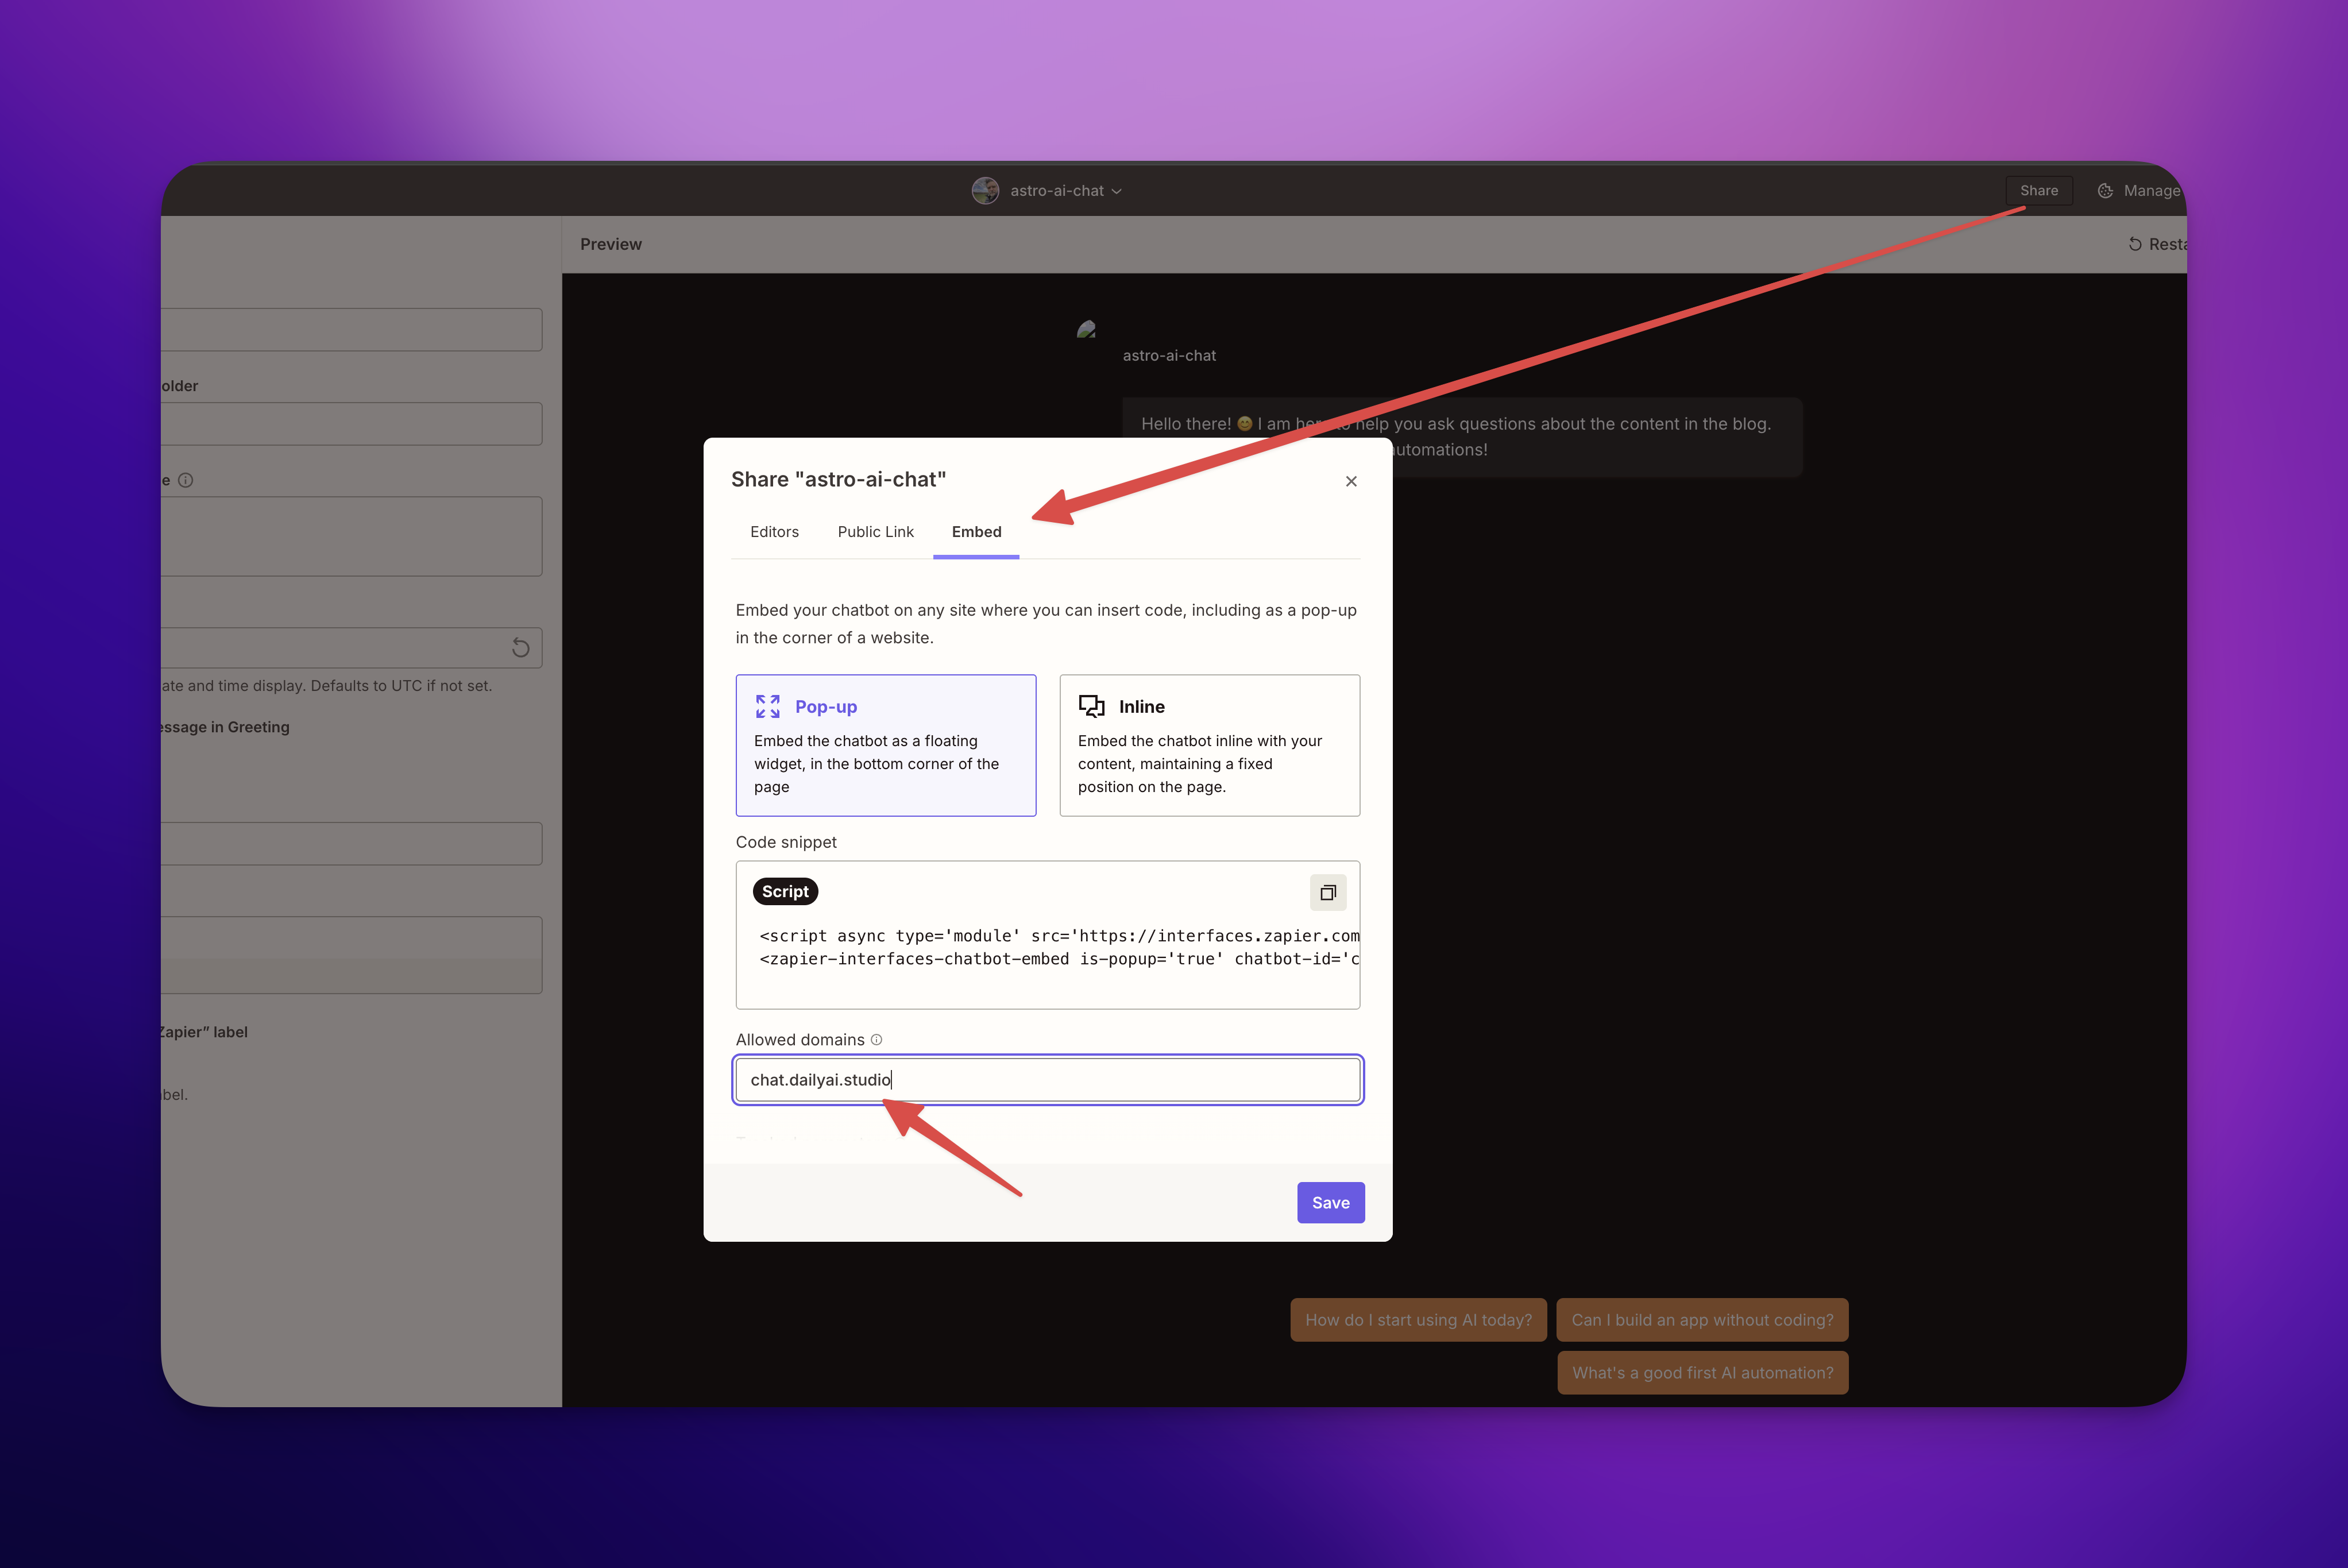
Guardrail #2 — Domain restriction on the embed
The chatbot embed is two lines of code that go on your page:
<script async type="module" src="https://interfaces.zapier.com/.../zapier-interfaces.esm.js"></script>
<zapier-interfaces-chatbot-embed chatbot-id="cmoj74awm0042hwpo0ey6l4ou"></zapier-interfaces-chatbot-embed>
That code is public. Right there in your HTML. Anyone can View Source and copy it.
Without domain restriction, somebody could paste those two lines onto their own site and have a working chat that answers questions about your content, runs on your token budget, and gives them a free product. That’s the kind of thing you find out about three weeks later when your task usage is mysteriously through the roof.
With domain restriction on, the chat only works on the domain you list. Somebody copies your embed onto randomguy.com, the iframe refuses to load. Game over.
This is two clicks in Zapier. The same protection in a vibe-coded version is two days of careful work — CORS headers, JWT-signed requests, origin validation, a server in front of the model. All doable, none of it interesting.
Guardrail #3 (a quiet one) — refusal behavior
Remember that line in the system prompt: “if a question can’t be answered from the blog, say so honestly.”
Try it on my chat. Ask it “Who won the Super Bowl last year?” — it’ll tell you it doesn’t know, because that’s not in my content.
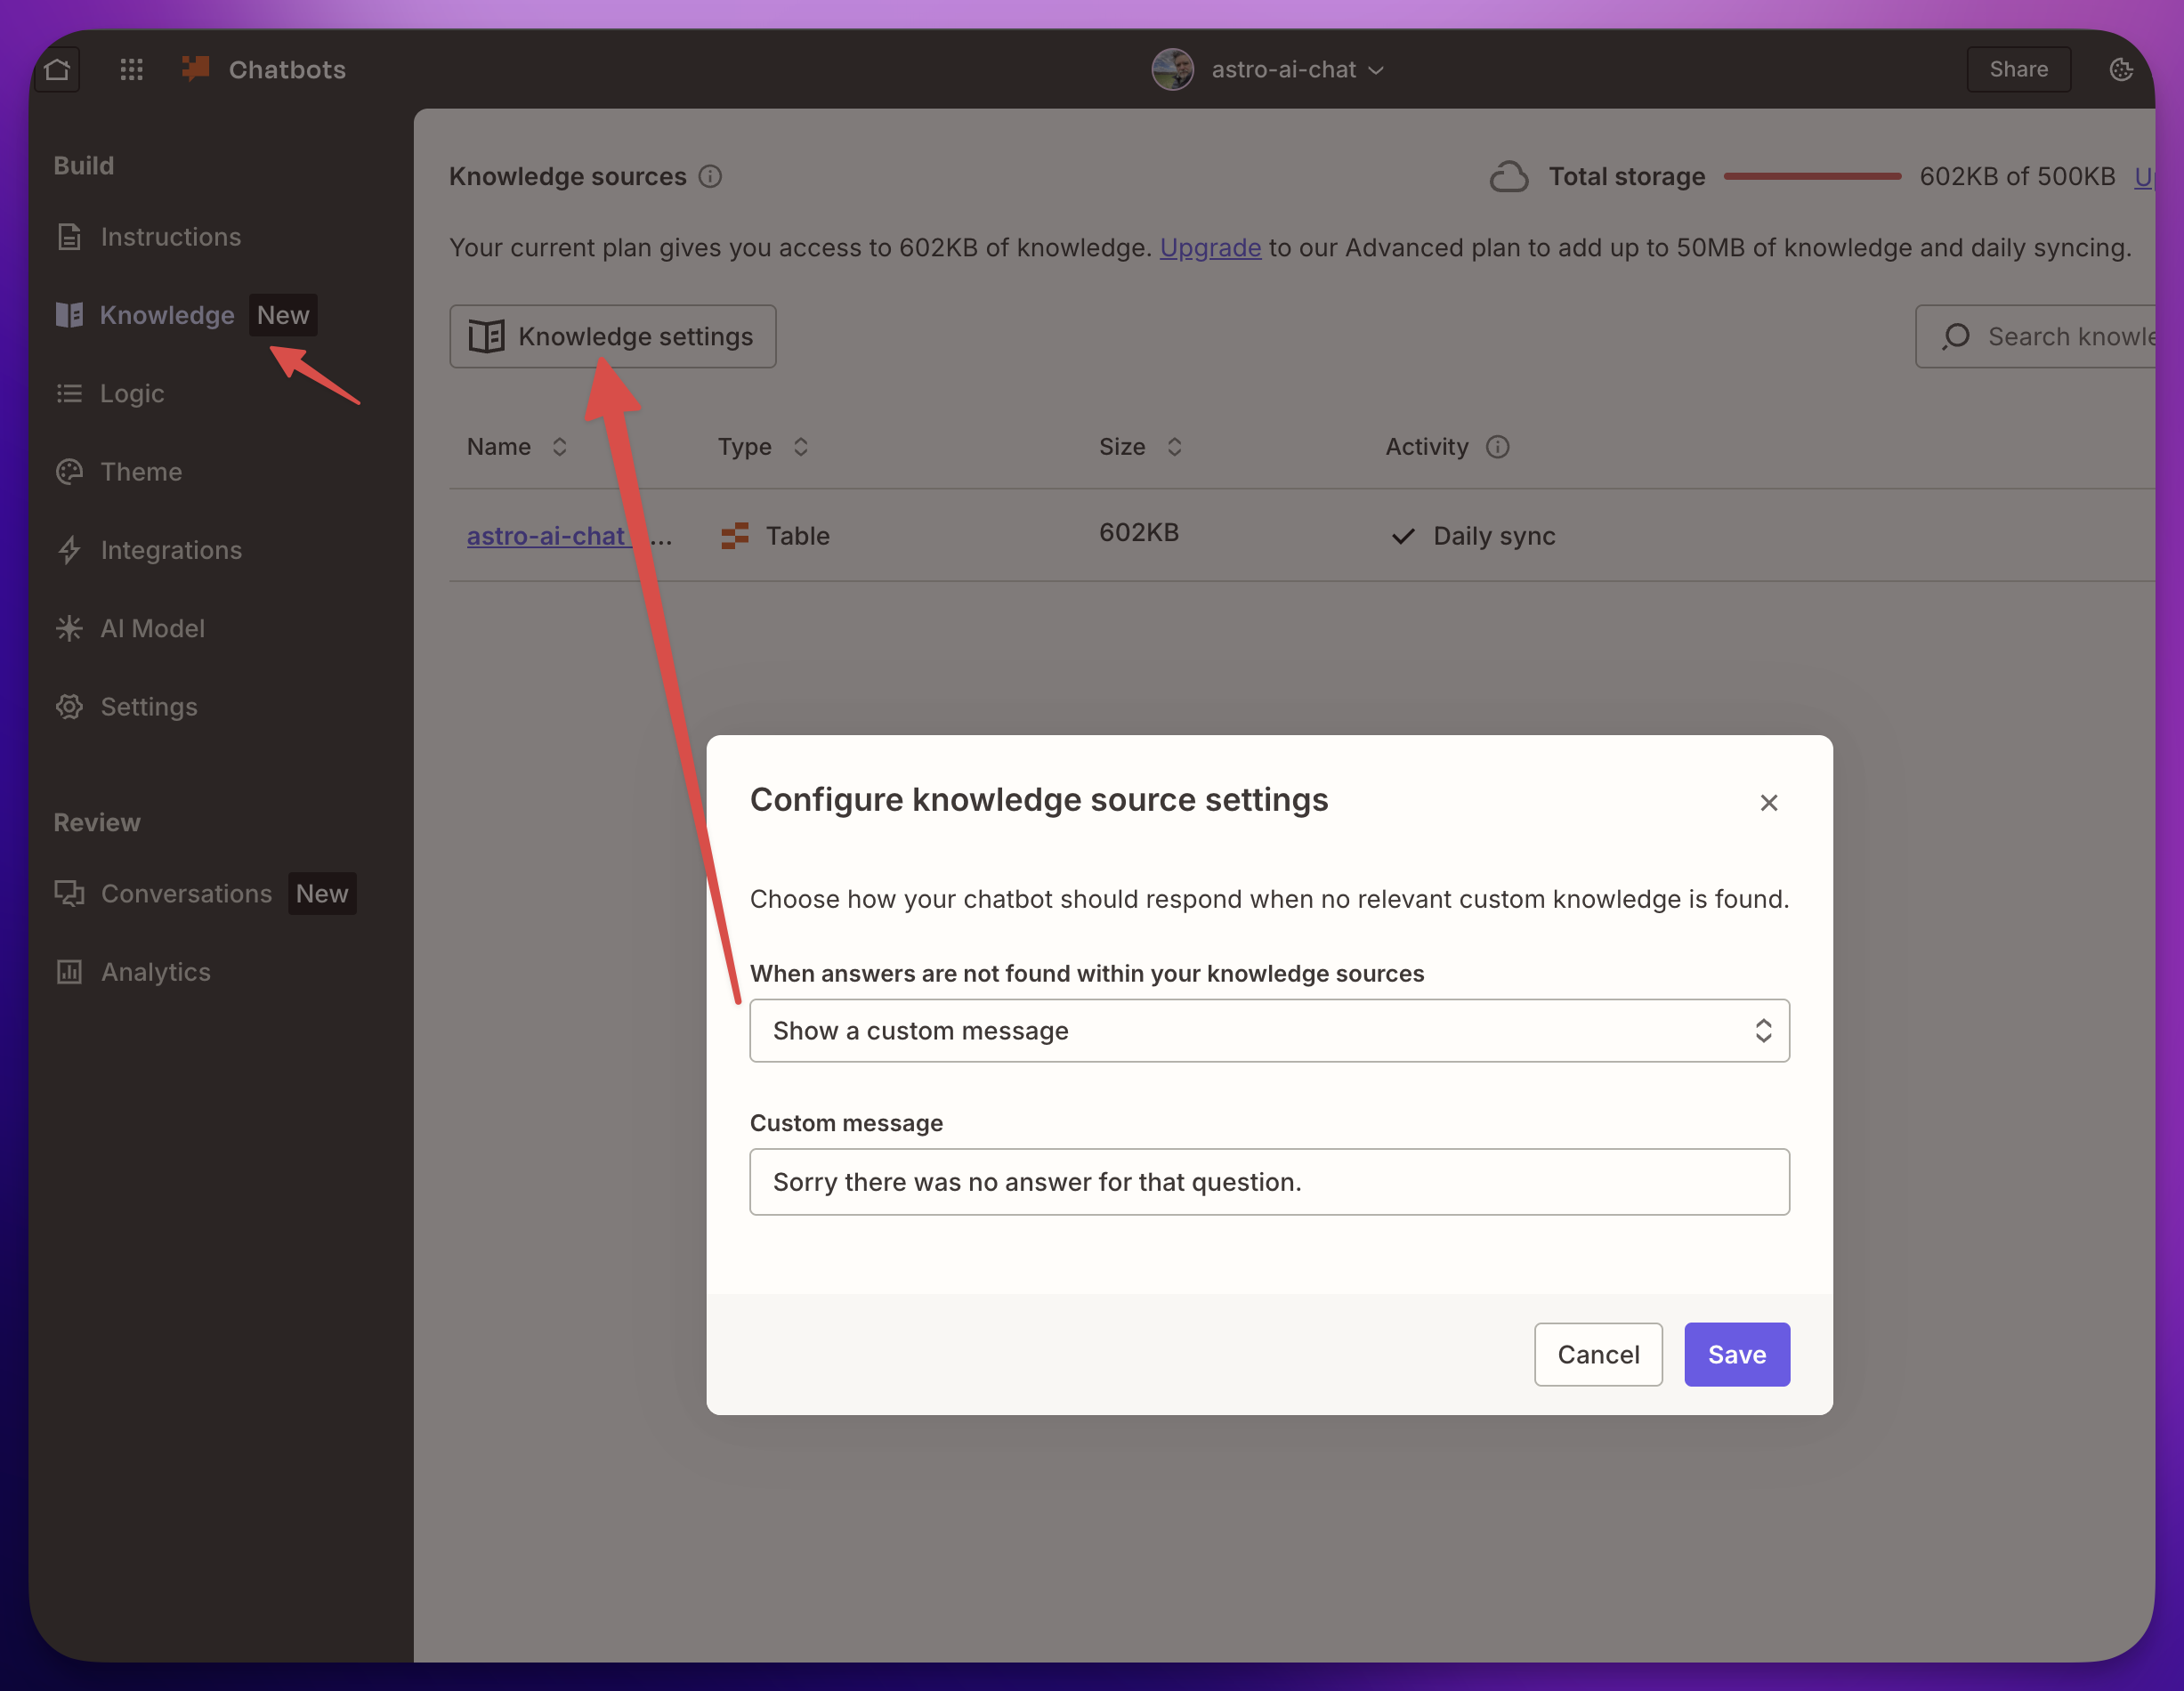
This isn’t a security feature in the cost-cap sense. It’s a behavior feature. The bot stays in scope. It doesn’t try to be helpful by inventing things. That’s the difference between a chat that helps your readers and a chat that quietly invents stories about your business in front of customers.
But also I set the AI to have a low creativity level:
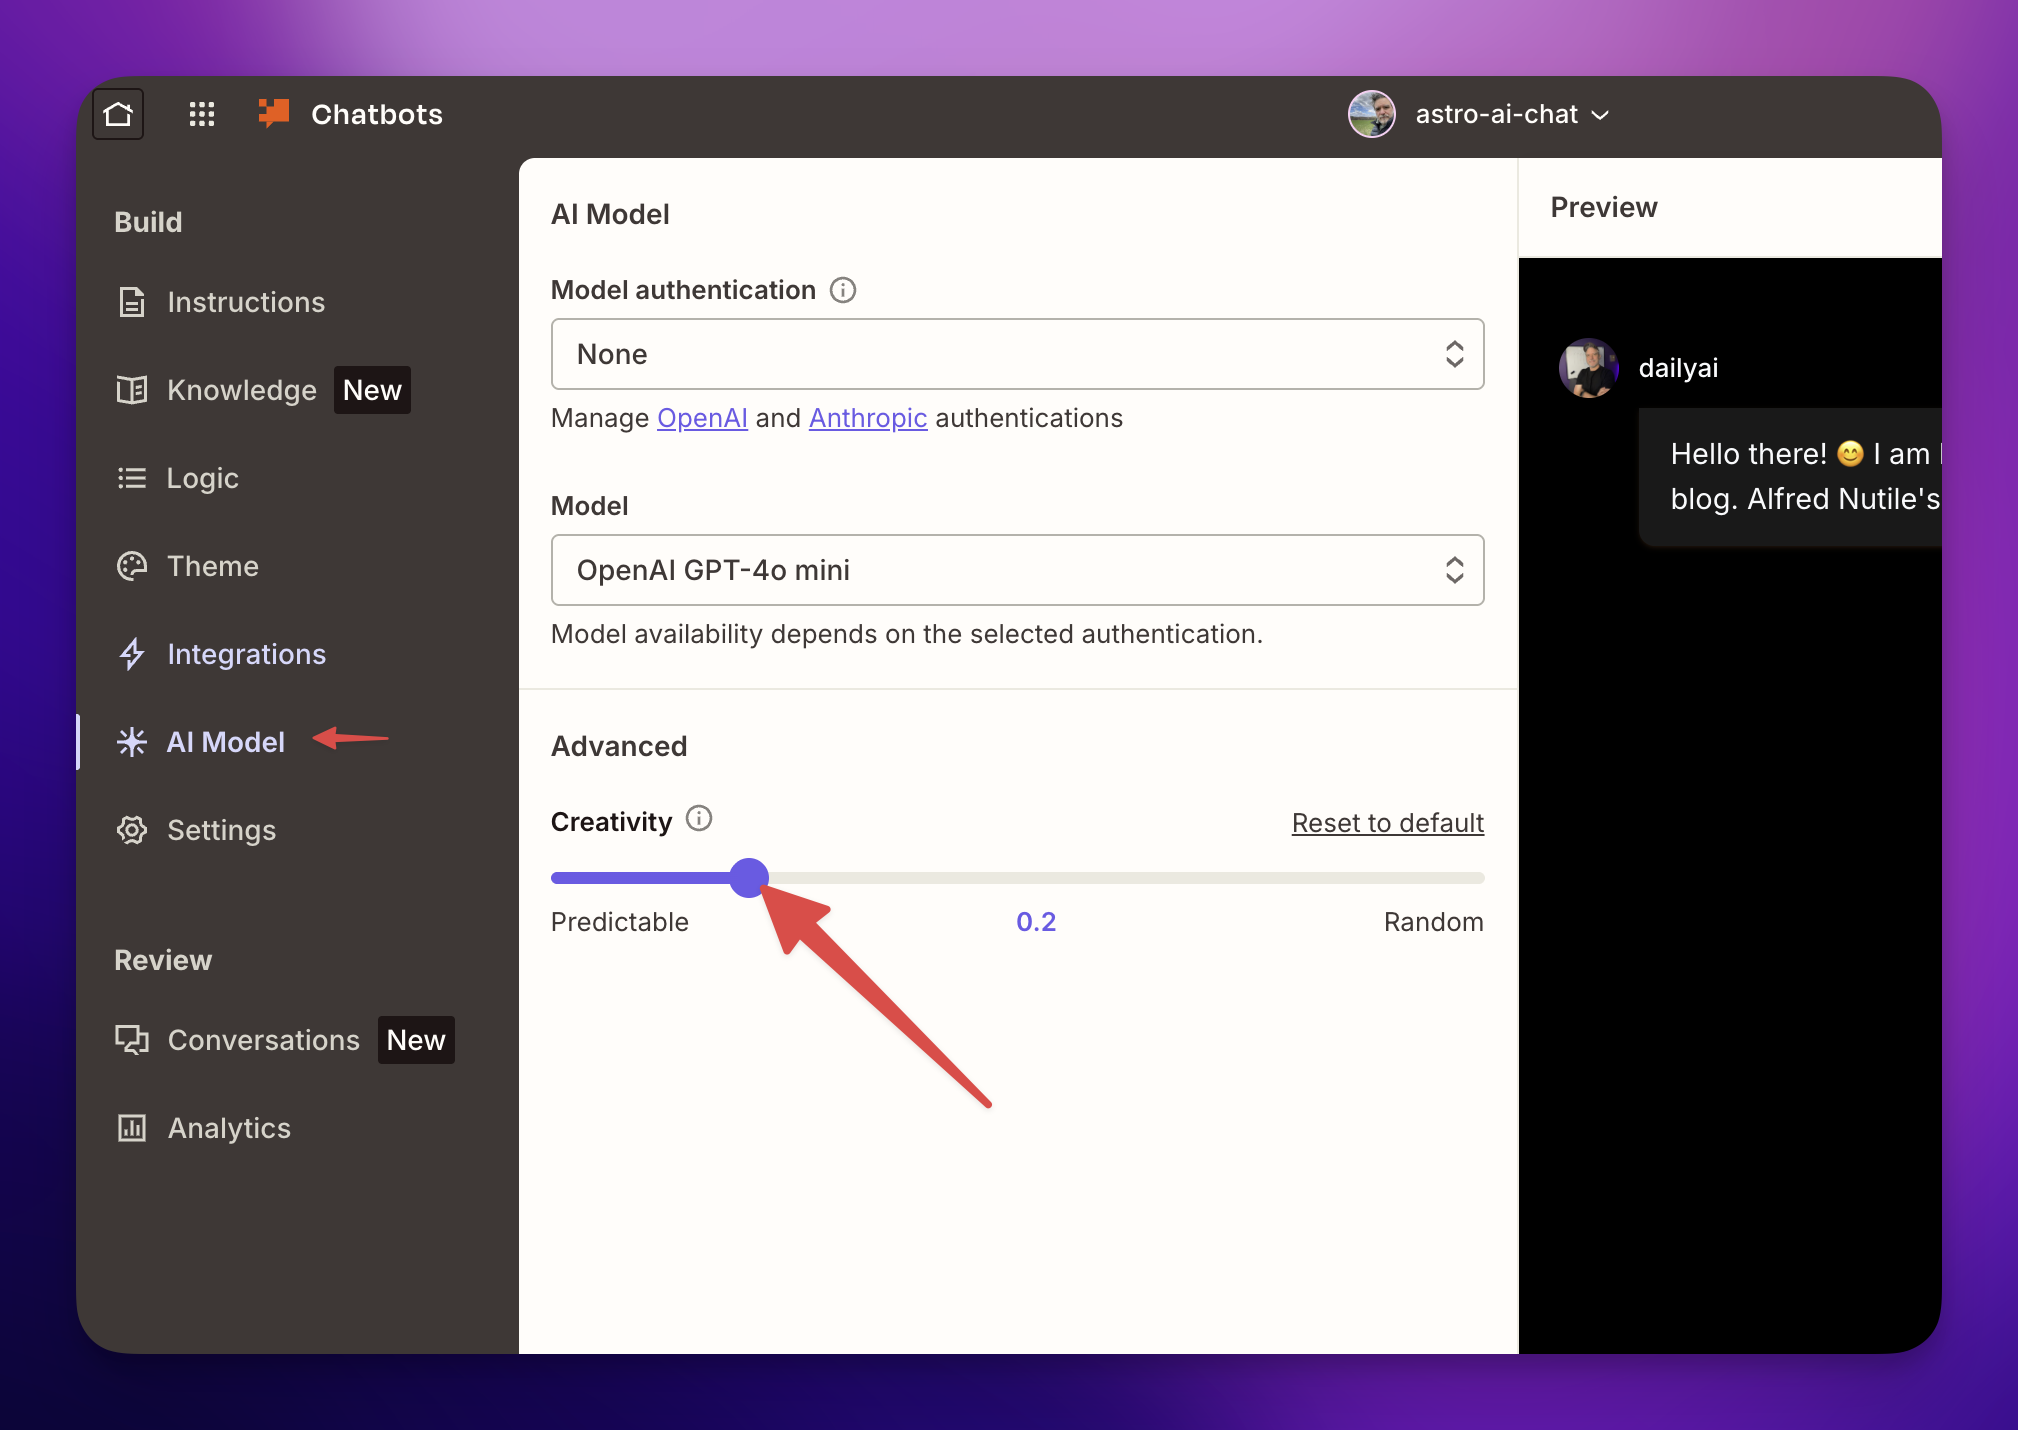
Three lines of system prompt, free, do it.
The chatbot has a few more sections to cover.
Logic
Here you can add ‘Logic’ like Suggested Messages and more.
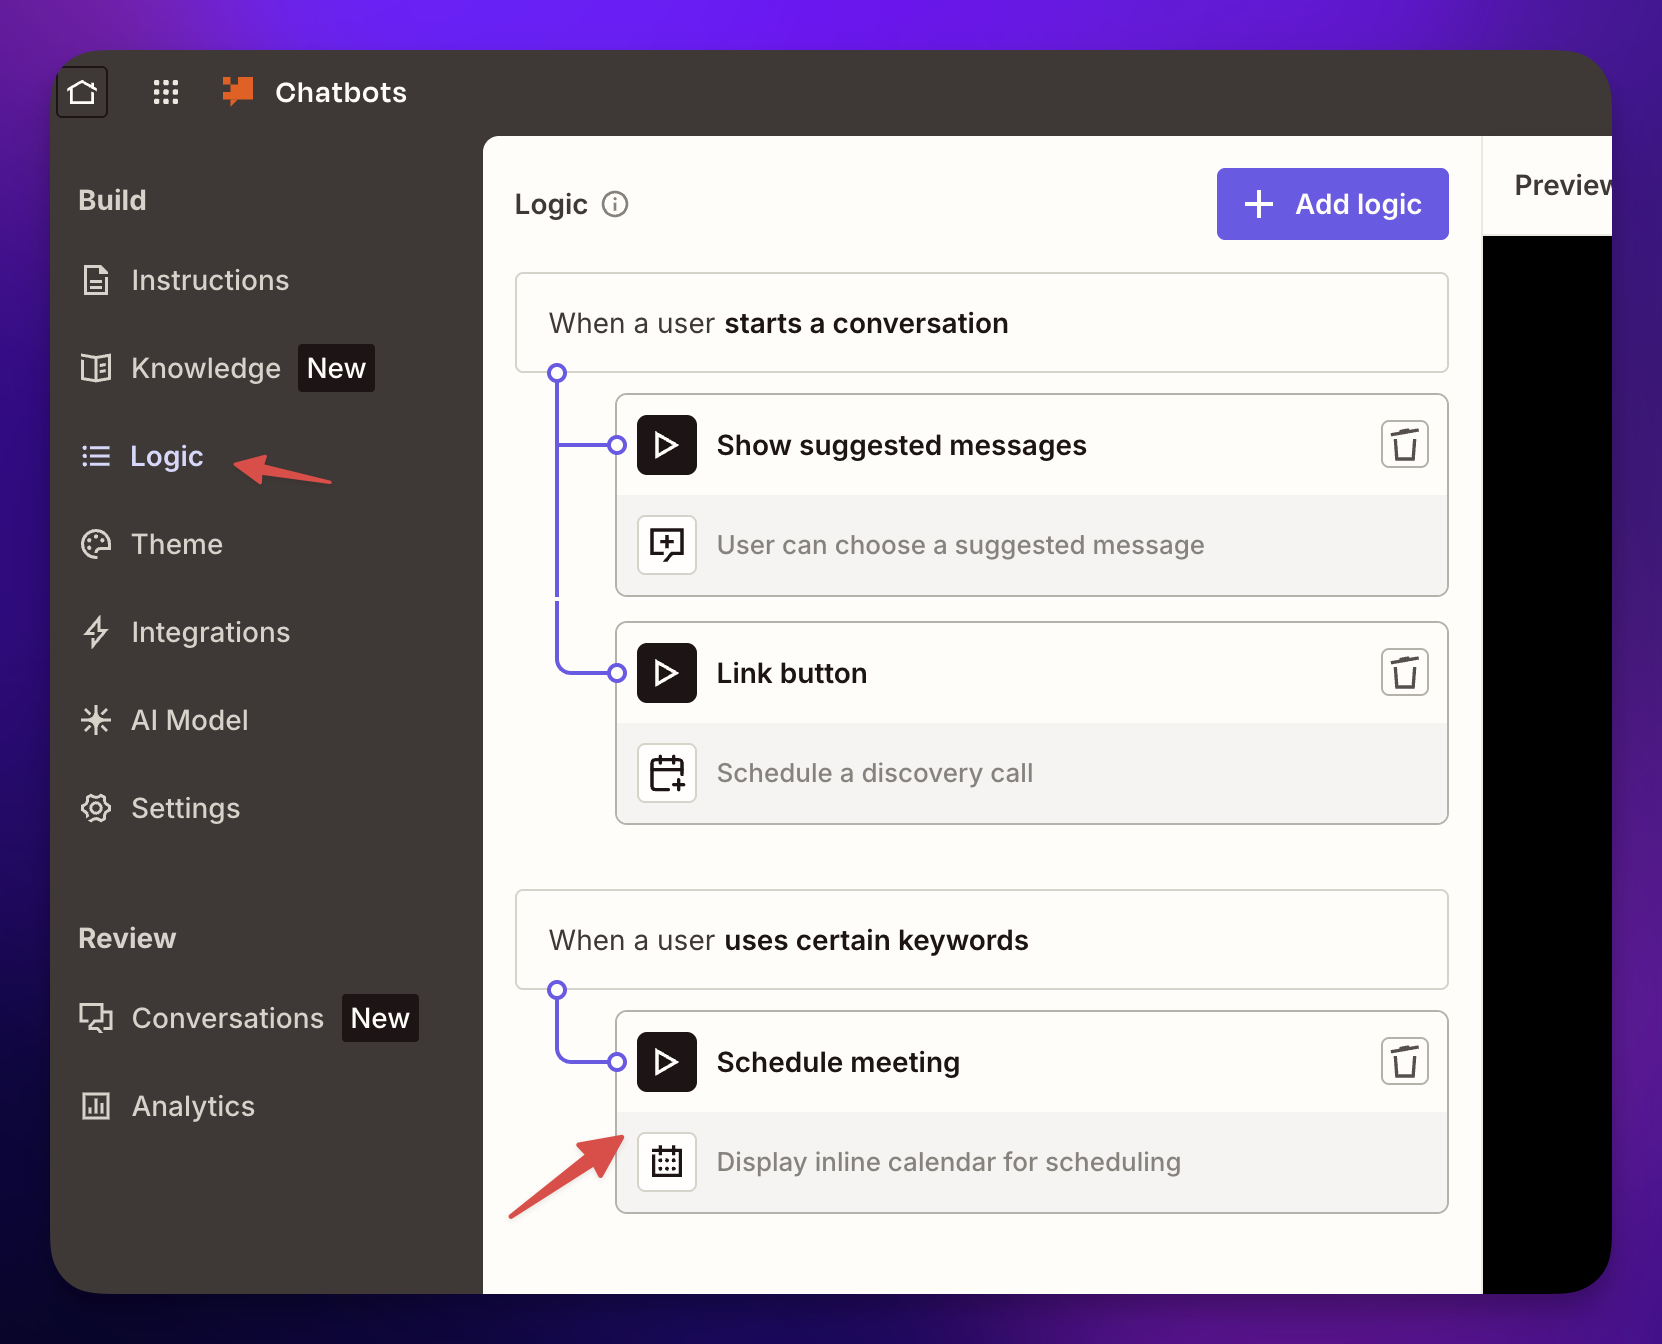
These “Suggested Messages”, I think are key since you can help the user get started chatting with your data. Of course there is a lot more you can do like “Run Zaps” etc. But keep in mind these “tools” are one more way that people can “hack” your AI so less is best for right now.
Step 4 — The data layer (Zapier Tables)
I used markdown as my data. And I gathered some files from Substack to then post here. Then I made a Zapier Table called astro-ai-chat - knowledge source with five columns:
| Column | What goes here |
|---|---|
file_path | src/content/posts/active-pieces-as-an-mcp-server.md |
title | The post title |
url | Where to link readers back to |
content | The markdown body of the post |
published | The date |
That’s the whole schema. Each row is one post. The chatbot’s “knowledge” is wired to this table — when somebody asks a question, the bot retrieves the most relevant rows and uses them to write the answer.
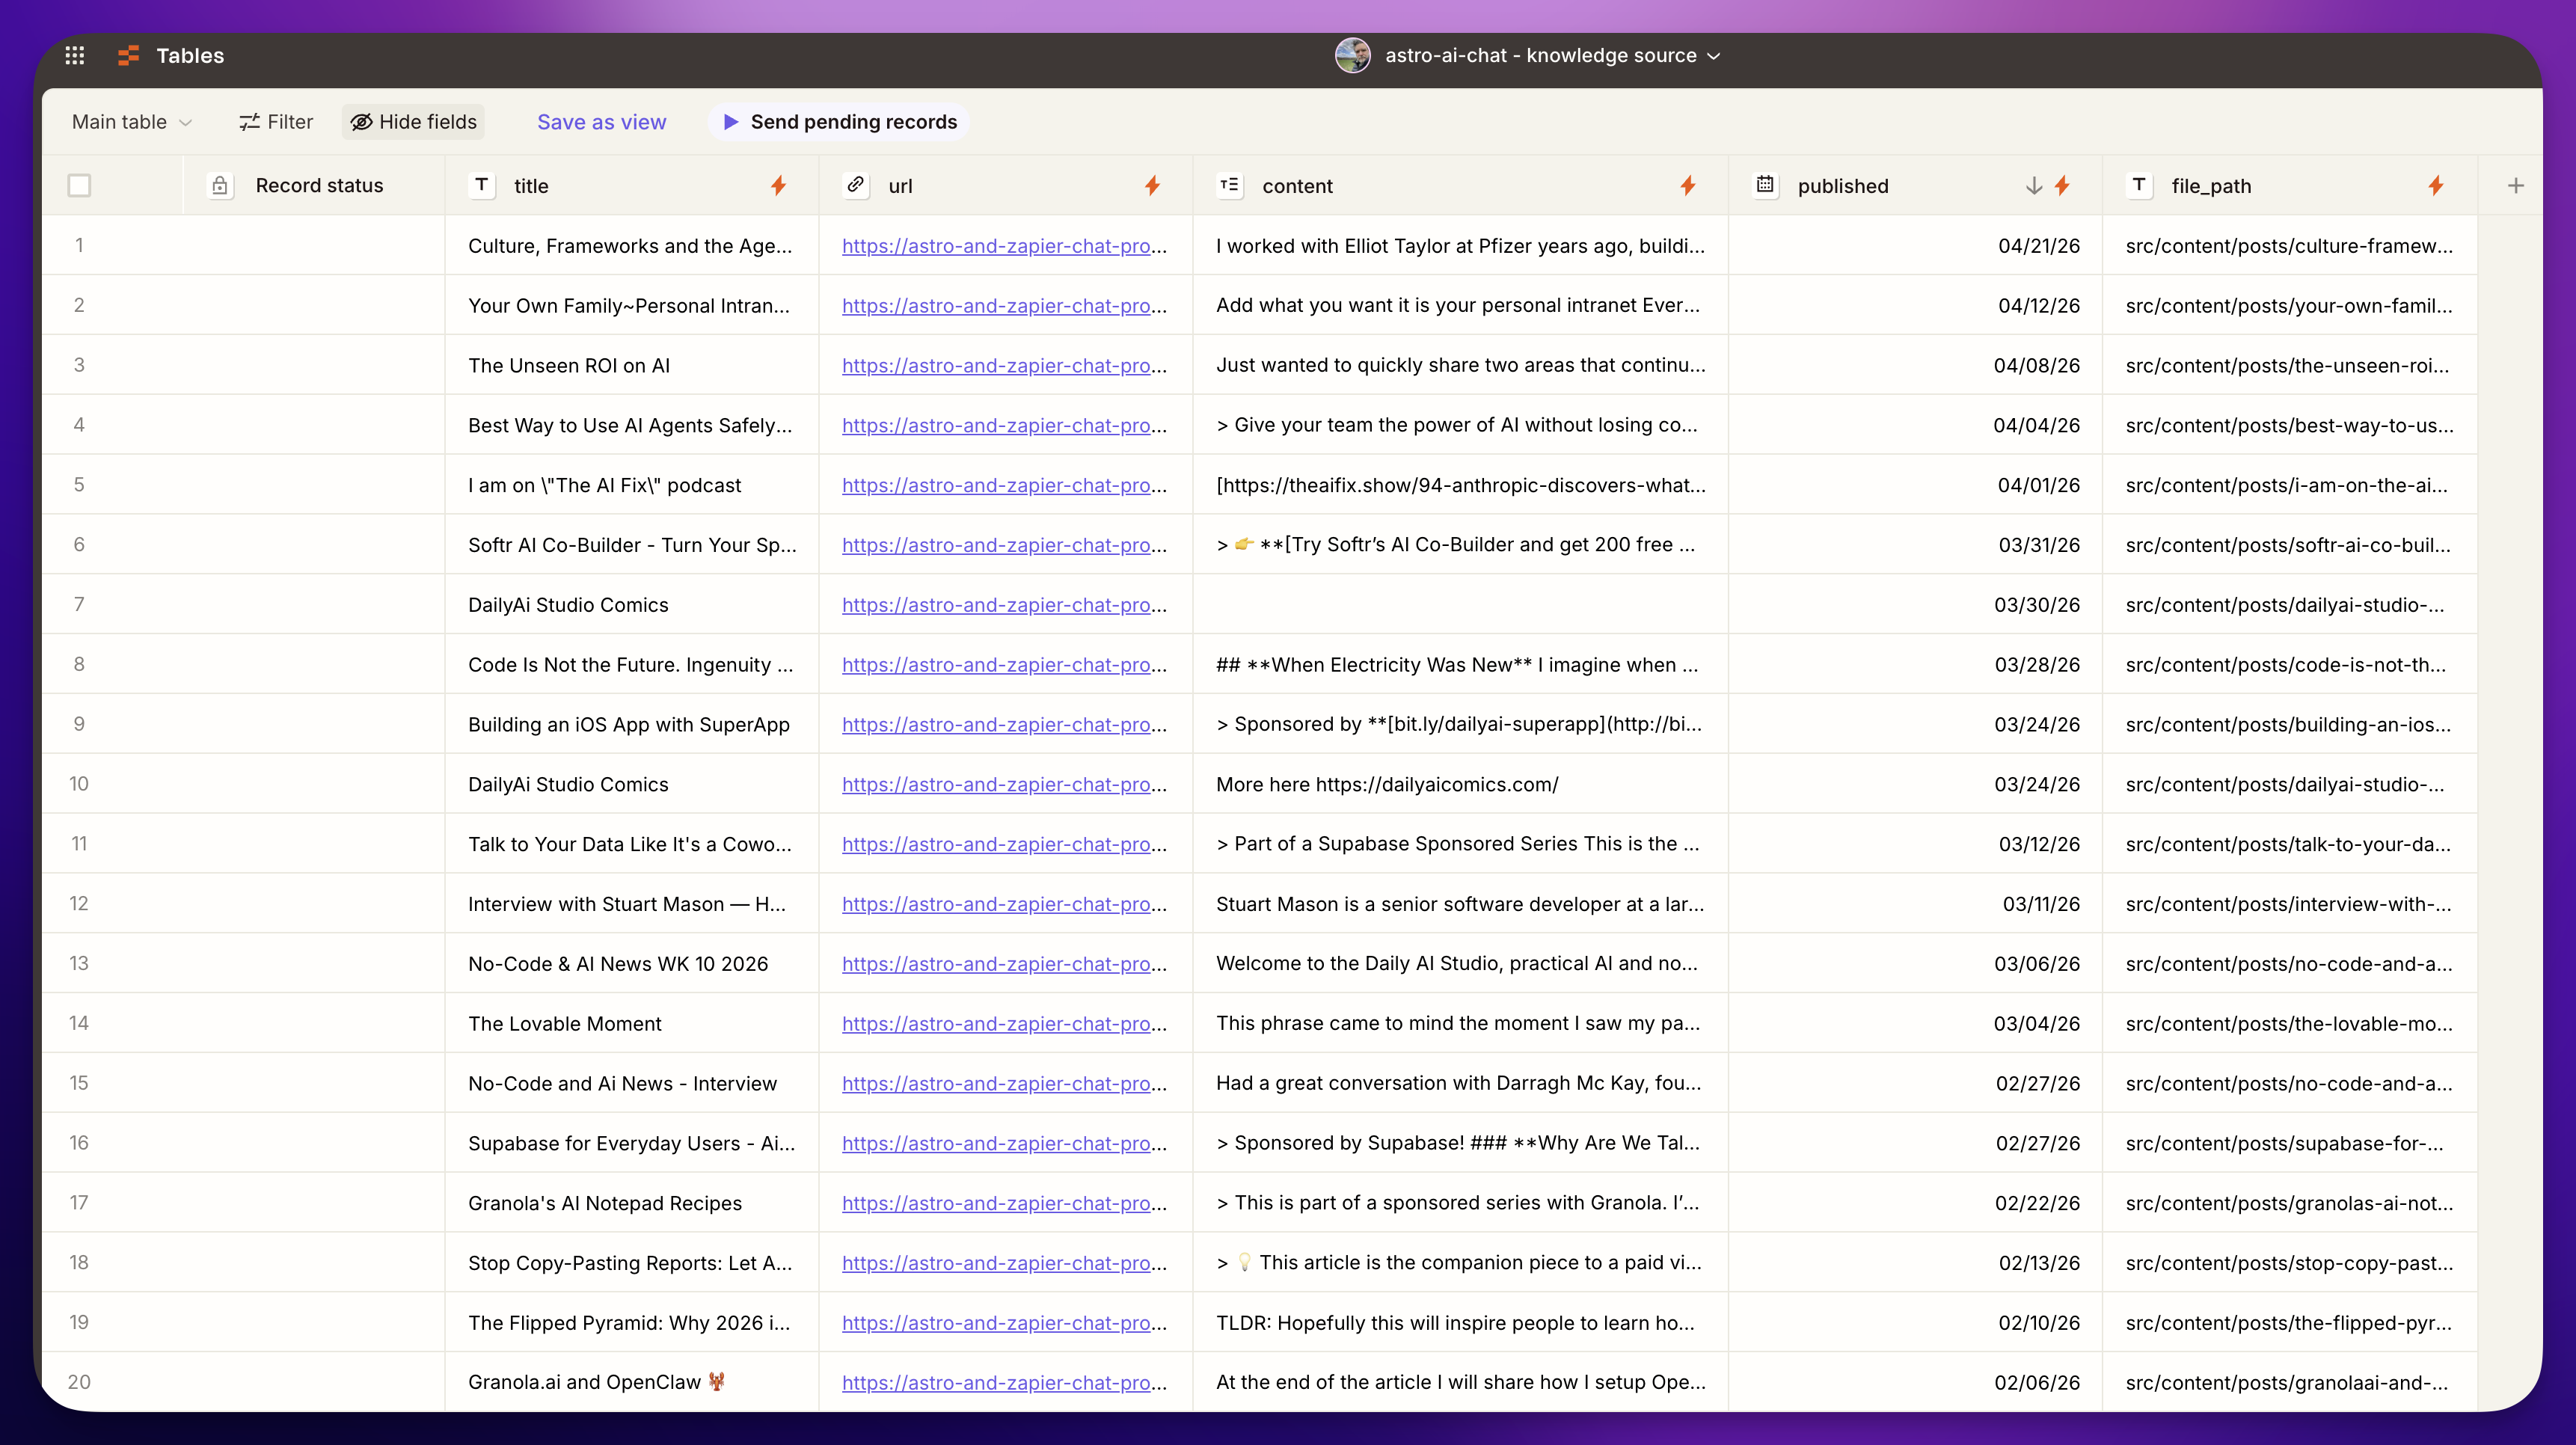
For the first load, Claude Desktop dumped all my existing posts as a CSV and imported it. One click. The table went from empty to 157 rows in about twenty seconds.
But here’s the thing — I write new posts every week. I don’t want to remember to update the table every time. I want it to just happen.
Step 5 — The automation that keeps it fresh
This is where it gets fun.
Every push to GitHub is a trigger. So I built a small Zap that says:
- Listen for new commits to my blog repo
- Look at which markdown files changed
- Read the content of each changed file
- Update the matching row in the Zapier Table (or create a new row if it’s a brand new post)
That’s it. Five steps in Zapier.
This is just one example
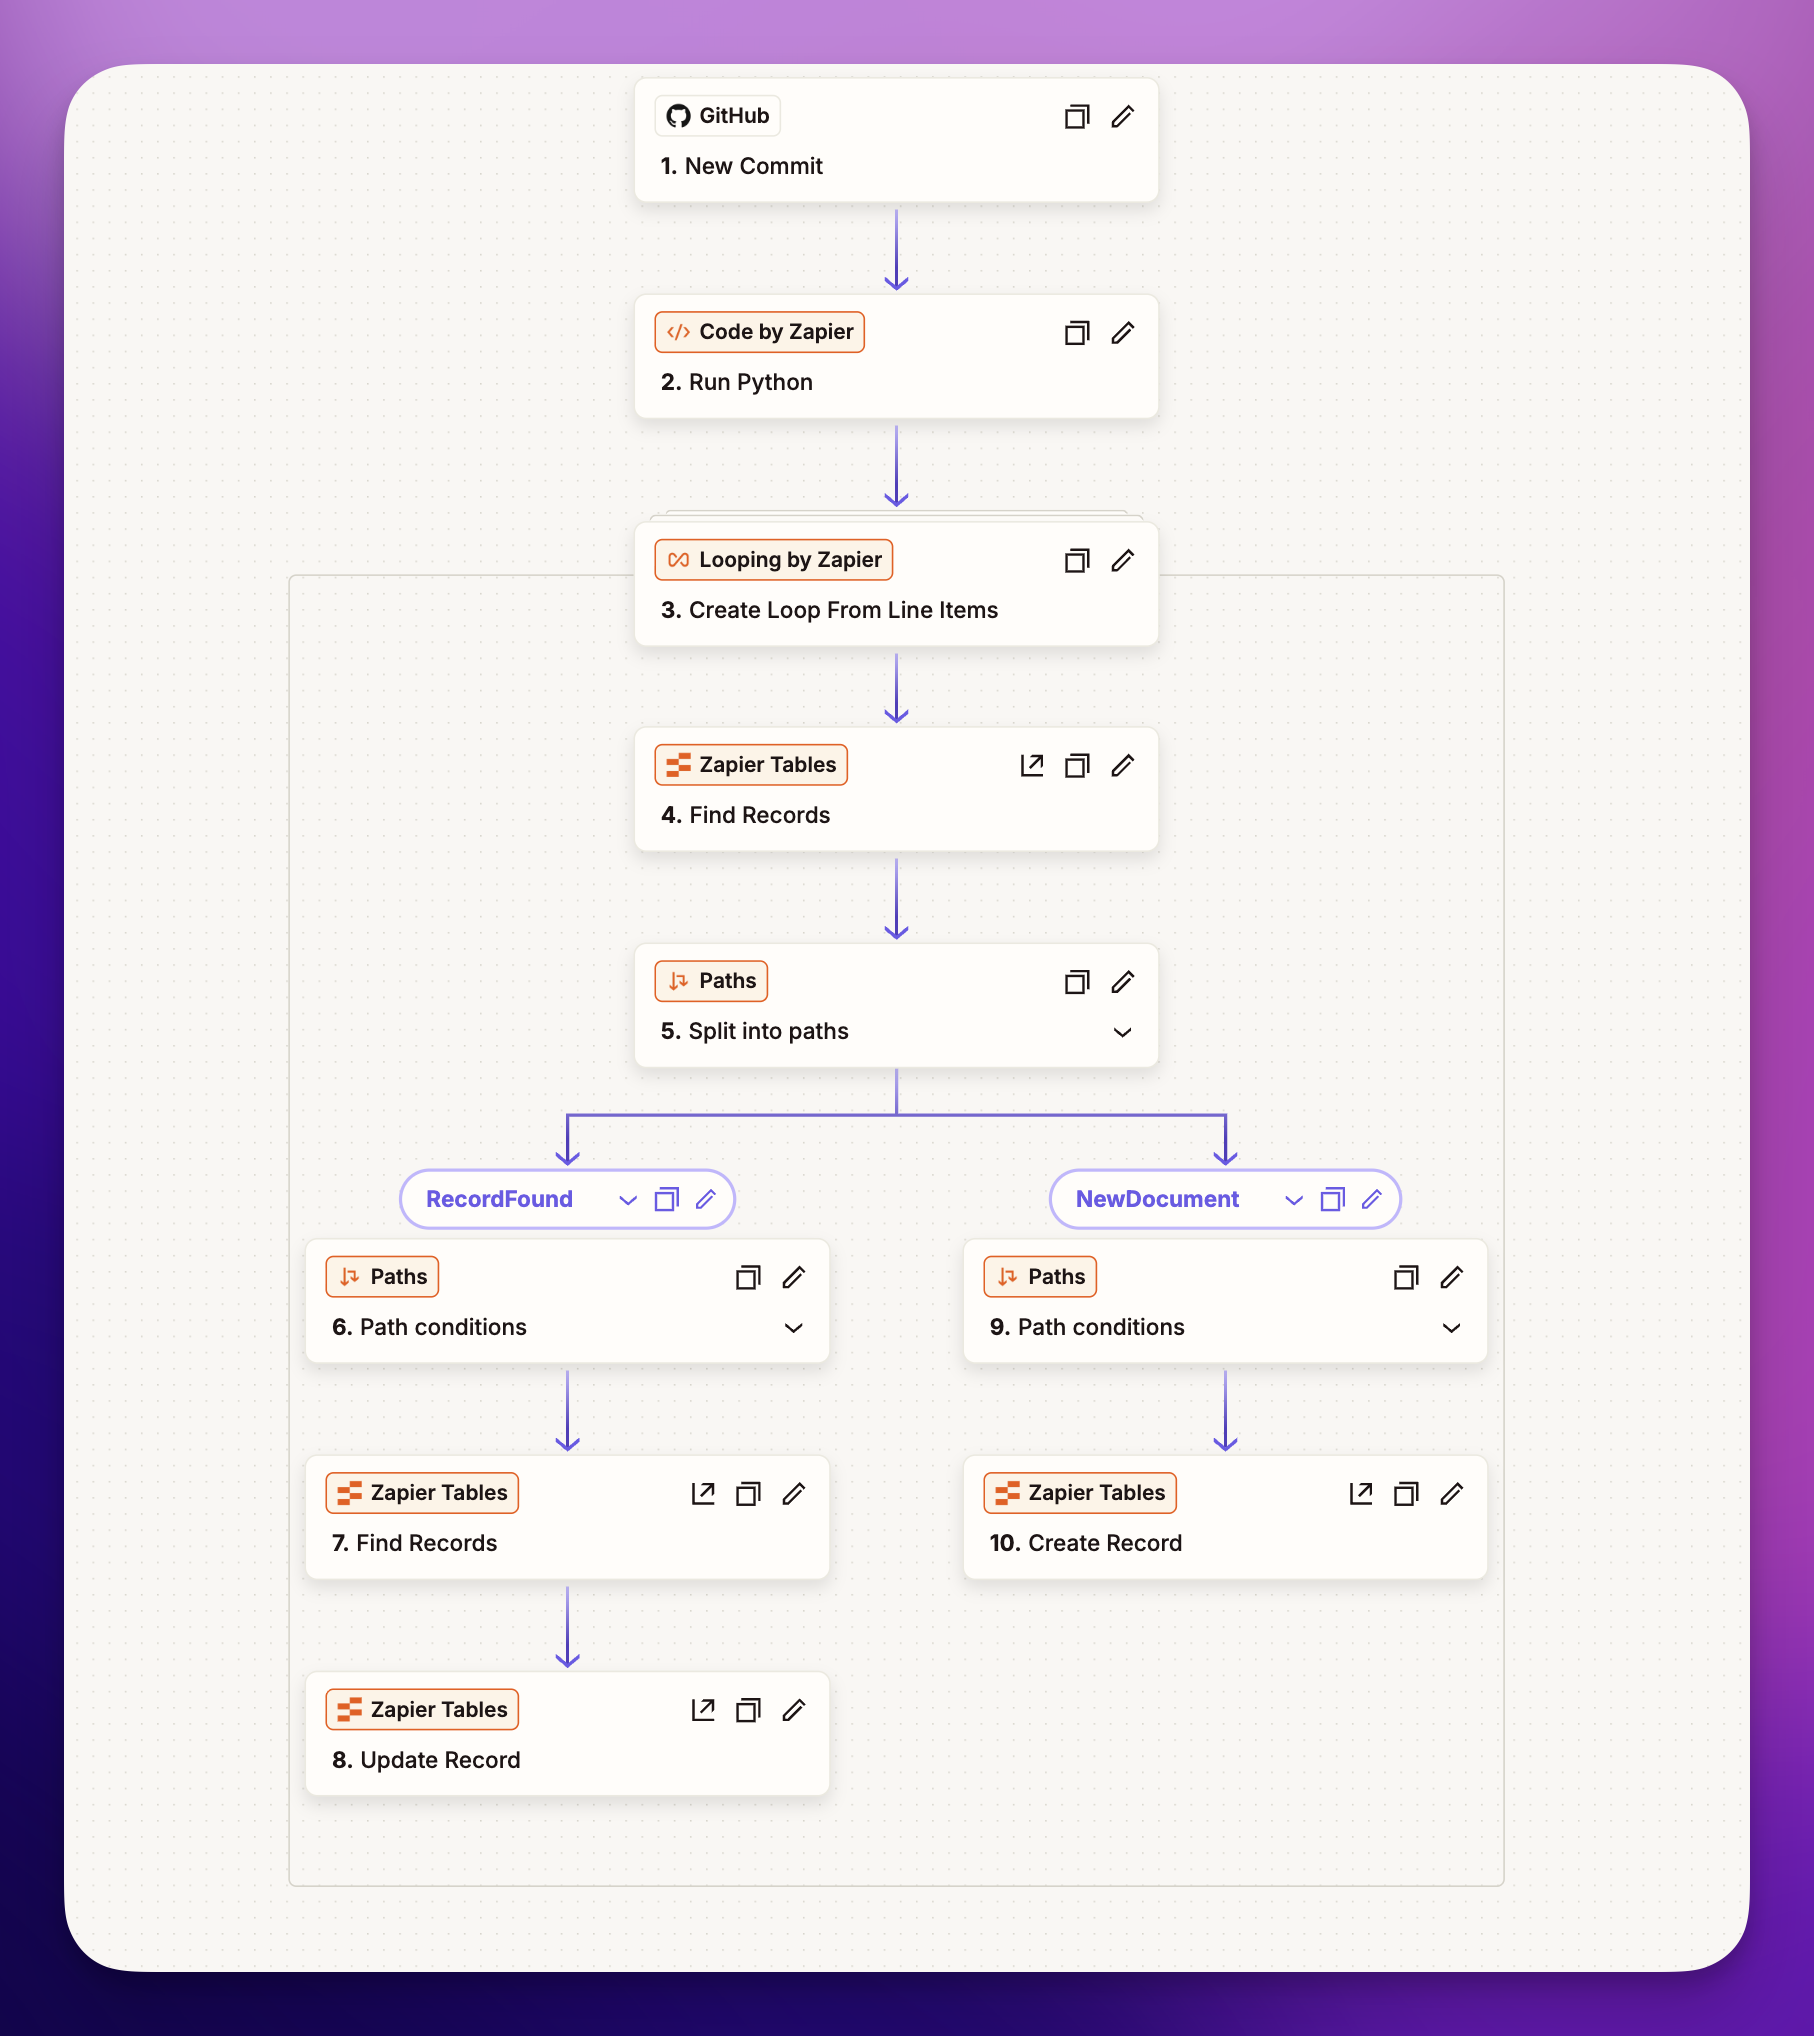
I built this whole Zap by talking to Claude Desktop, which has Zapier connected via something called MCP. It walked me through every step — what trigger to pick, what fields to map, how to handle the upsert logic. I would not have done this drag-and-drop alone in any reasonable time. With Claude in the loop, it was an evening.
The end result: I write a post, push to GitHub, and within a minute the chat already knows about it. No babysitting. No manual sync. The blog rebuilds and redeploys itself, and the chat updates itself, off the same one push.
Why this pattern goes way past blog posts
Now imagine the same pattern with other data:
- A YouTube channel — when you upload a video, transcribe it, push the transcript to the same table
- A LinkedIn or Twitter feed — when you post, capture the text, push it to the table
- Meeting notes from Granola or Otter — when a meeting ends, push the notes to the table
- A separate site for client work — same idea, separate table or shared
Same chat, same guardrails, more sources. That’s where this becomes genuinely useful — when one careful chat can see across everything you write, no matter where you wrote it.
The careful guardrails — the cost cap, the domain lock, the refusal behavior — they don’t get harder as you add more data. They scale with you for free.
The honest comparison — careful vs. cowboy
You can vibe-code this whole thing. The internet has tutorials. Pick a vector store, write some code to embed your content, hook it up to OpenAI’s API, build a frontend.
What you don’t get from a tutorial is the careful version. The cost cap. The domain lock. The refusal behavior. The audit trail of every conversation. The “what happens when something goes wrong at 3am” answers. Those are things you build because you got bitten — and the platform did, on your behalf, before you ever started.
For 70% of what people want from a chat — read my content, answer questions, link back to sources — that’s the trade I’d take. Trade some flexibility for safety rails I didn’t have to design.
The other 30% is where you really do need a custom build. Maybe you need to integrate with a specific internal system. Maybe you need fine-grained access control. Maybe regulatory reasons. Don’t build that until you actually need it. Start with the safe-by-default version. Move to custom when you’ve watched the workflow run for a week and you know exactly what it costs and where it falls short.
You don’t have to worry about those things until you have to worry about those things.
What to take away
Three takeaways for your own site, in priority order:
- Set a cost cap somewhere. Whether it’s a Zapier plan tier, an OpenAI billing limit, or both — pick one and make it real. This is the single most important thing on this list.
- Lock the embed to your domain if your chatbot platform supports it. Two clicks. Skip this and you’re publicly subsidizing a chat for whoever finds your script tag.
- Tell the bot what it doesn’t know. Three lines in your system prompt: only answer from this content, refuse otherwise, no inventing.
That’s it. A chat for your site that won’t sink you.
Coming up
A video walkthrough of this build is on the way — same pattern, same two guardrails, with the screen recording to show every click. If you want to be the first to see it, the chat on this page already knows my newsletter signup is at the bottom of every page. Ask it. (Yes, that’s a flex. The bot can take it.)
Until then — start small. Ten minutes, one chat, your content. The careful version.
Learn more about Zap Chat here
Github Zap to Table Template here
The Blog with Chat here
Frequently asked questions
- How do I add a chatbot to my website without risking a huge bill?
- Use a setup that enforces a hard cost cap for you. When you hit your plan limit the chat simply stops responding instead of running up an open-ended bill. Setting that cap before you go live is the single most important step.
- Can someone copy my chat embed and use my AI on their own site?
- Not if you add a domain lock to the embed. Even if someone pastes your script tag onto their own page, it does nothing for them — the chat only works on the domains you allow.
- Do I need to be a developer to set this up safely?
- No. This careful version uses Zapier Chat, Tables, and a Zap to make your GitHub content chattable, and the two guardrails — the cost cap and the domain lock — take about ten minutes total.