Building an iOS App with SuperApp
was pleasantly surprised by the results of this collaboration. I would suggest any business wanting to make apps for internal use or entrepreneurs with an app idea to give it a try!

Sponsored by bit.ly/dailyai-superapp BUT hold on this is one again an amazing product making something possible I could not have dreamt of just a year ago.
There’s a video version of this if you prefer that, but for those who like to read
Now that that’s out of the way — if you need or want to build an iOS app, this is a moment where you can actually do it without any developer skills. And this doesn’t just mean apps for the App Store. Think about apps you’d use just in your office, your department, your company. Internal tools that never need to go public though they can go public as well. SuperApp will even get you into the Apple developer portal so you can run a TestFlight — I’ll talk about that below.
Here’s what we’re going to cover: First, we’ll install SuperApp and build a real app. Then we’ll talk about a couple of tricky spots — setting up a database and navigating the Apple developer ecosystem (which is just plain tricky). By the end, you’ll really be able to do this yourself.
Let’s dive in.
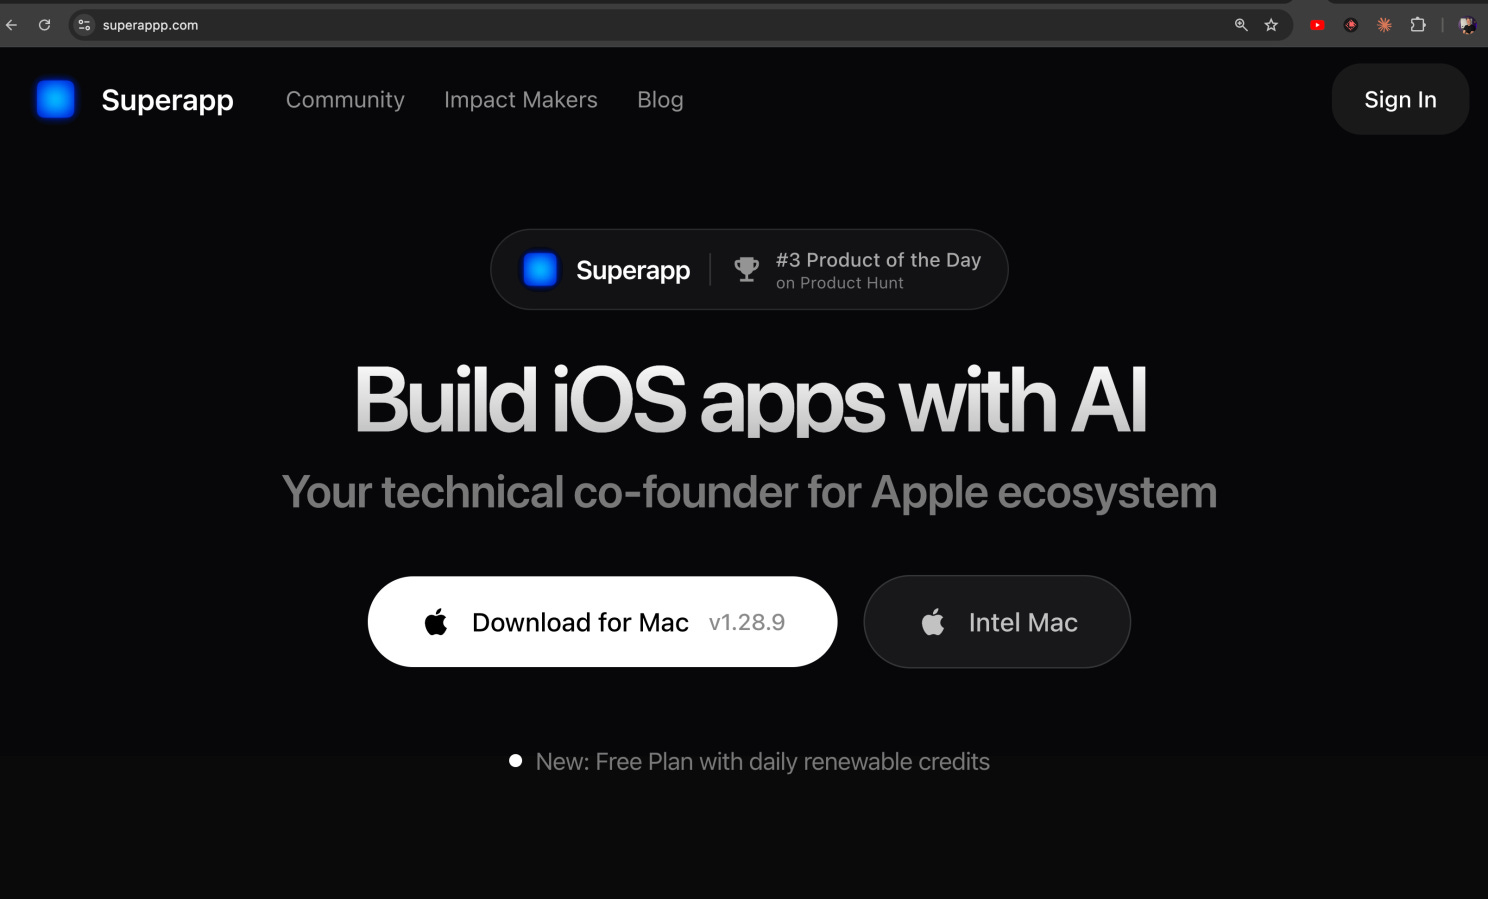
Step 1: Download and Install SuperApp
First, download SuperApp. It only works on Mac right now since it builds native Swift apps — but if none of that made sense, don’t worry. Just download, log in, and build.
[

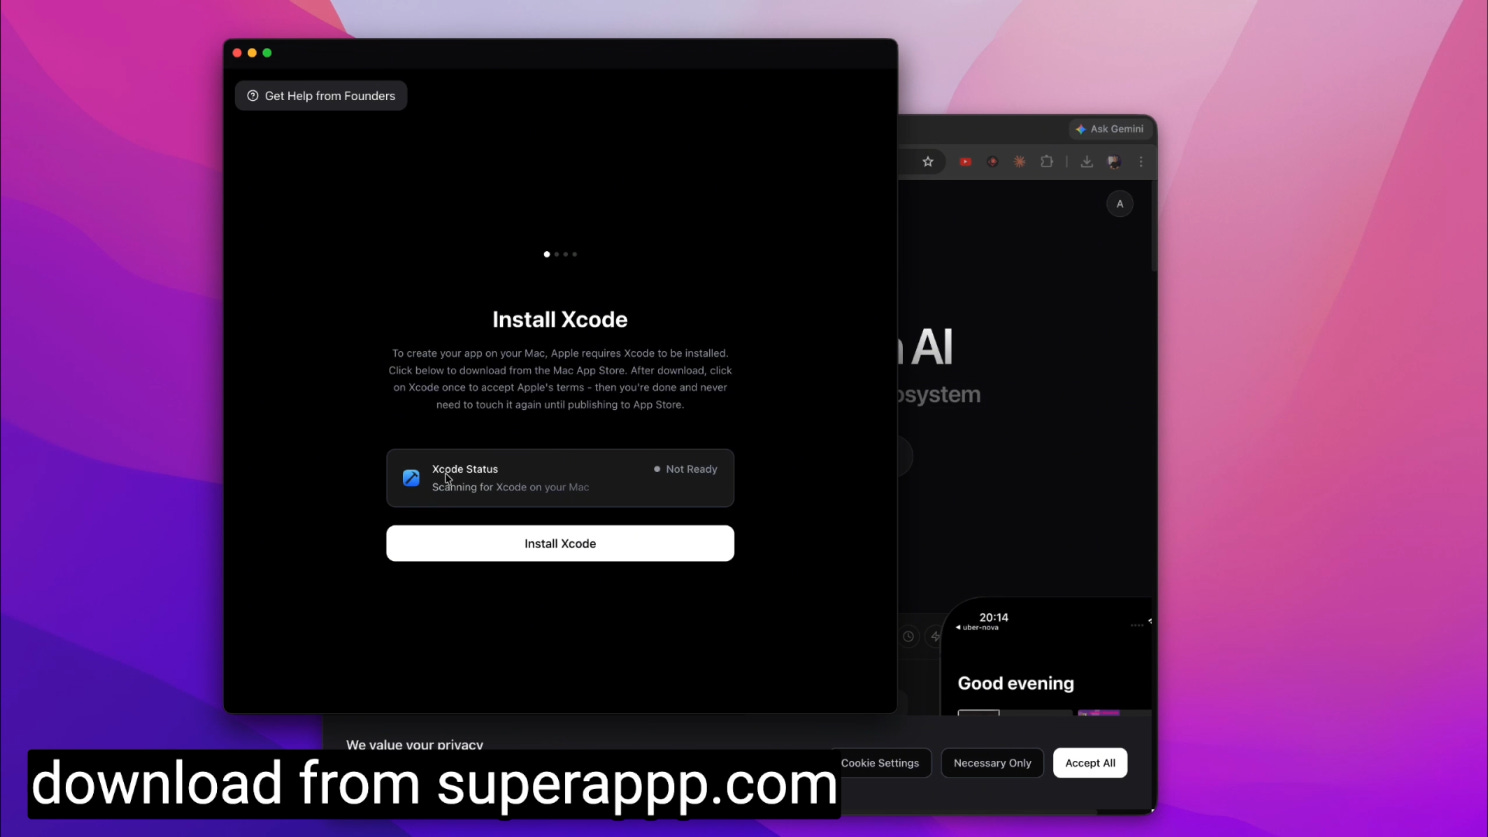
](https://substackcdn.com/image/fetch/$s_!Ao6B!,f_auto,q_auto:good,fl_progressive:steep/https%3A%2F%2Fsubstack-post-media.s3.amazonaws.com%2Fpublic%2Fimages%2Fce81ee70-ff31-4333-bf86-48563eaca849_1488x899.png) It is a Desktop App so Download it first
Once you get the app running, it walks you through installing everything you need. Those steps are just clicks and waiting, so that’s good. It walks you through it really well. Just be patient — there are a lot of downloads.
[

](https://substackcdn.com/image/fetch/$s_!xAYE!,f_auto,q_auto:good,fl_progressive:steep/https%3A%2F%2Fsubstack-post-media.s3.amazonaws.com%2Fpublic%2Fimages%2F1bbc96c2-b4d6-4b03-bc96-98690c044b96_1488x837.png) SuperApp will walk you through all the Xcode Setup
Once everything’s set up, you’ll see all green buttons and you’re ready to roll. You’ll have a simulator on the left and your building interface on the right. That’s how I laid it out.
Step 2: Prompt Your App Into Existence
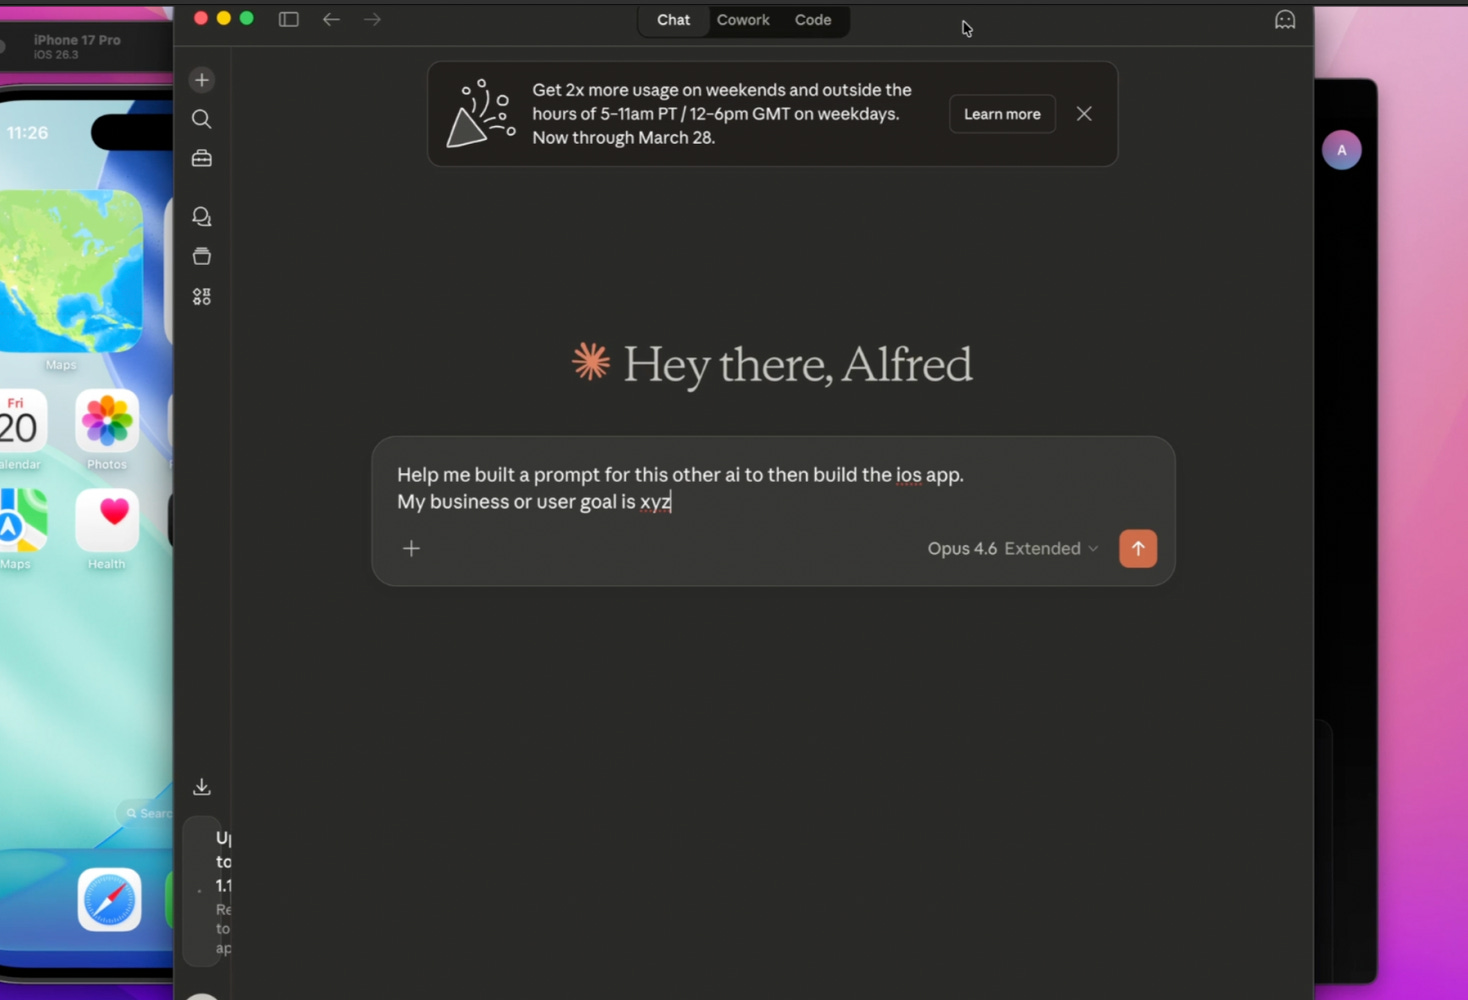
This is the fun step. I went to Claude and reminded it — hey, I don’t want you to build this app for me. I want to use a different tool that’s going to build it. Just make me a prompt to explain to that tool what I want.
[

](https://substackcdn.com/image/fetch/$s_!aMJ8!,f_auto,q_auto:good,fl_progressive:steep/https%3A%2F%2Fsubstack-post-media.s3.amazonaws.com%2Fpublic%2Fimages%2F1b35b6ed-3fe3-4f61-8f97-9112e2e14ffb_1468x1000.png) Let Claude help you build the business and user experience prompt
In this case, I wanted an app for a barbershop. The idea: take a photo of a customer and show them different haircuts and styles on their own face, almost within seconds. So the app needs to take photos, hit an API, and display the result.
Think about how useful that is — a non-public app that doesn’t need to go to the App Store. Anyone working in the shop can use it to give the customer a better experience. That’s a real competitive edge.
I took the prompt Claude gave me and pasted it into SuperApp. I didn’t give it any design goals, but you could. You could go to Google Stitch for some great design tips if you want to take your time with that.
When I first ran the prompt, I used my own API — it suggested a different service that probably would’ve been easier, but I wanted to use mine since I have it set up through Nano Banana, which I really enjoy. Then we just wait. We watch it build. And when it’s done, we start doing QA.
In the video, you’ll see I had a few issues across both builds (this was my second build since the first one worked so well I used it again for the video here). None of this stuff is perfect. But I just used the AI to fix the camera issue. Because this AI has access to Apple’s documentation and knows common bugs, it was able to handle those fixes.
First prompt done — we have an app. You can see it in the screenshots.
[
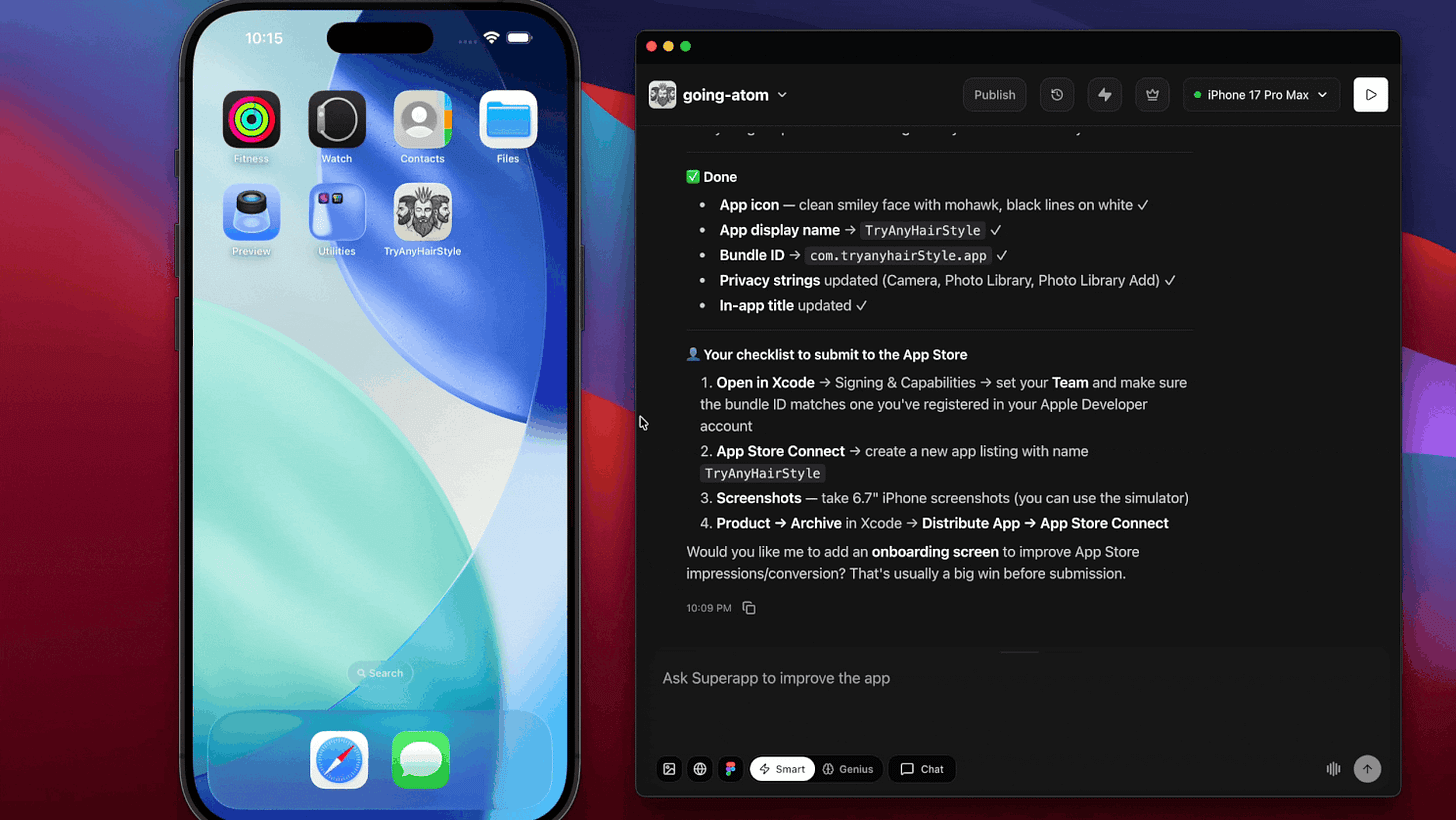
](https://substackcdn.com/image/fetch/$s_!F-K-!,f_auto,q_auto:good,fl_progressive:steep/https%3A%2F%2Fsubstack-post-media.s3.amazonaws.com%2Fpublic%2Fimages%2Fd18652d9-18e9-438d-822e-f7ce967560cc_1488x838.gif) In moments your app is running in the simulator
Step 3: Test It in the Simulator
At this point, you test in what they call the simulator. Now, the simulator doesn’t have everything perfect — it doesn’t do the camera, but it does use the gallery. When I push it to my actual phone, I can use the camera. So for now, I tested my image through the gallery.
Obviously, your use case will be different. But the system was able to take the photo and hit the API with it. Great progress.
Step 4: Setting Up the Database
During the build, it’s going to ask you about database settings. You might not even need a database — it depends on what you’re building. If you just said “take a photo of this plant and identify it,” you wouldn’t need one. It’d probably just use the web and Vision AI.
[
NOTE: you may not need this for your app
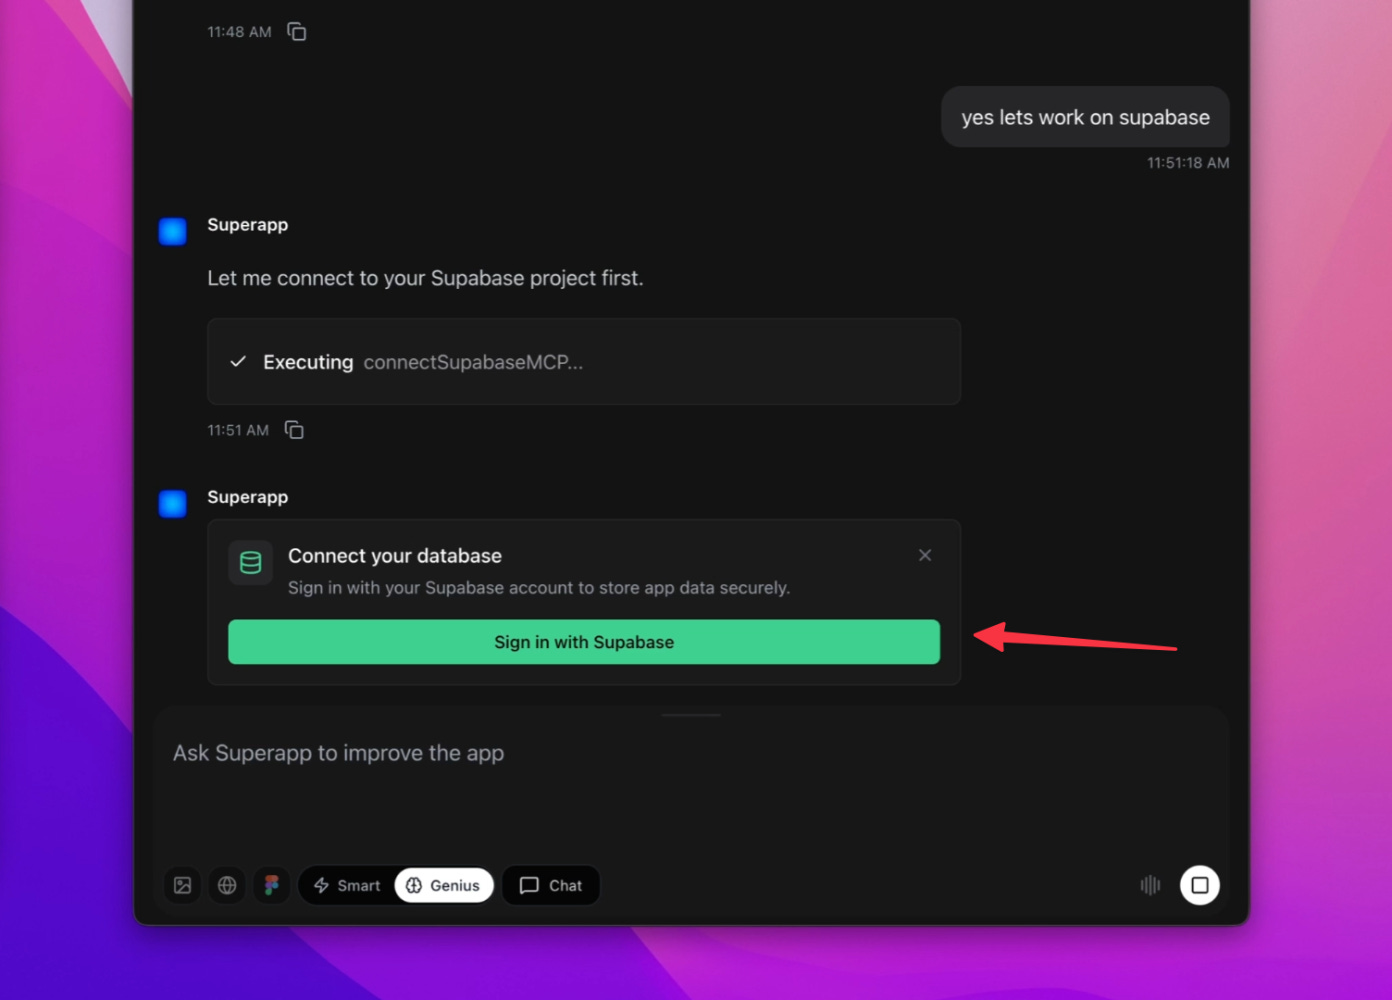
Try to keep it simple. Go with its default and see what happens. In this case, it suggested Supabase. And this is the first moment of “a little bit technical.”
I had to sign up for a Supabase account. I used my username and password — because what the heck is GitHub? I mean, I know what it is, but most people don’t, and they shouldn’t have to. After signing up (it’s free — the tier we need is free, and I don’t think they even need a credit card), I created a database, named it after my app, and then went back to SuperApp to connect it.
It wasn’t that bad, but just knowing these steps is kind of annoying. We’re getting there though. It’s getting so easy.
So why did the app even need a database? In my case, it was for storing secrets. That’s important — you don’t store secret keys inside the app itself. I had an API key for the service I was using, and that URL and key needed to be stored safely. This comes up a lot when building apps. Supabase can also do file storage, run a full database, and handle events for more advanced iOS apps.
That was the pain point. But now we’re past it.
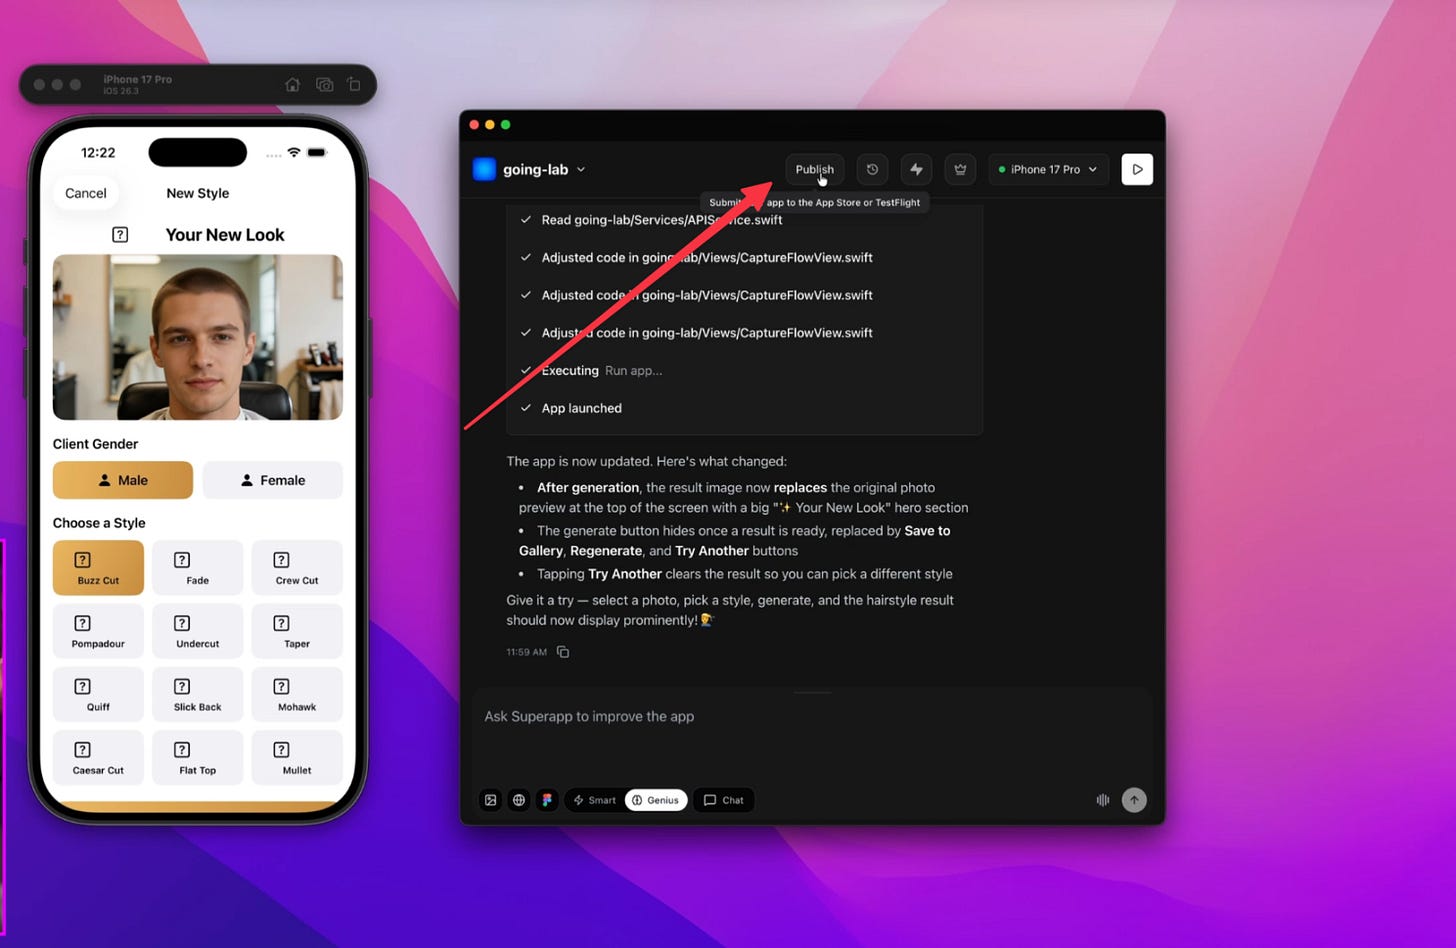
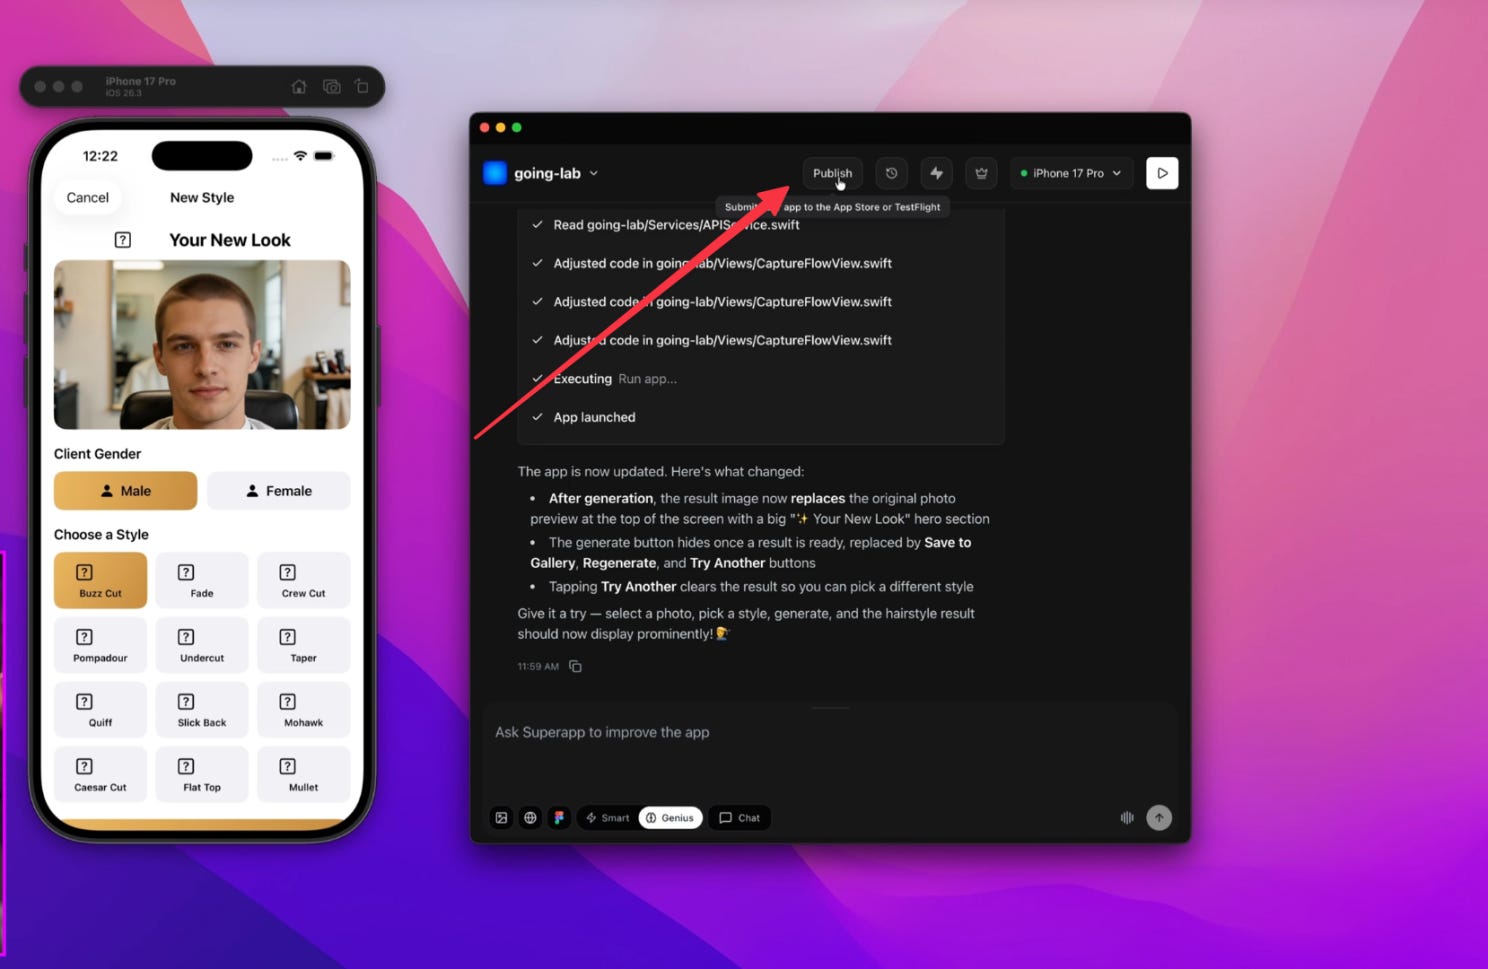
Step 5: Publish Your App
All right, here’s the tricky part. You have to sign up for an Apple developer account, and you have to pay them $100 just to be a developer on the platform. Frustrating, I know. So you’ve got to ask yourself — is it worth it?
[
](https://substackcdn.com/image/fetch/$s_!8AKk!,f_auto,q_auto:good,fl_progressive:steep/https%3A%2F%2Fsubstack-post-media.s3.amazonaws.com%2Fpublic%2Fimages%2Fb59a3e1a-935e-4811-8a42-fdfec2bb0b5a_1488x969.png) Once you have your Apple Developer account ready this part is easy!
If you’re someone with an idea you want to make real, or a business that wants to build a few apps to optimize how things run, then it makes sense. Sign up, become a developer, pay the money, and then wait — it could take up to two hours to kick in. I had to renew mine, and it took at least an hour.
When I came back to SuperApp, I could continue the publishing process and let it finish. Once it’s done, you get an email, and you’re part of TestFlight. TestFlight is an app you install on your phone — then through it, you install your actual app.
[
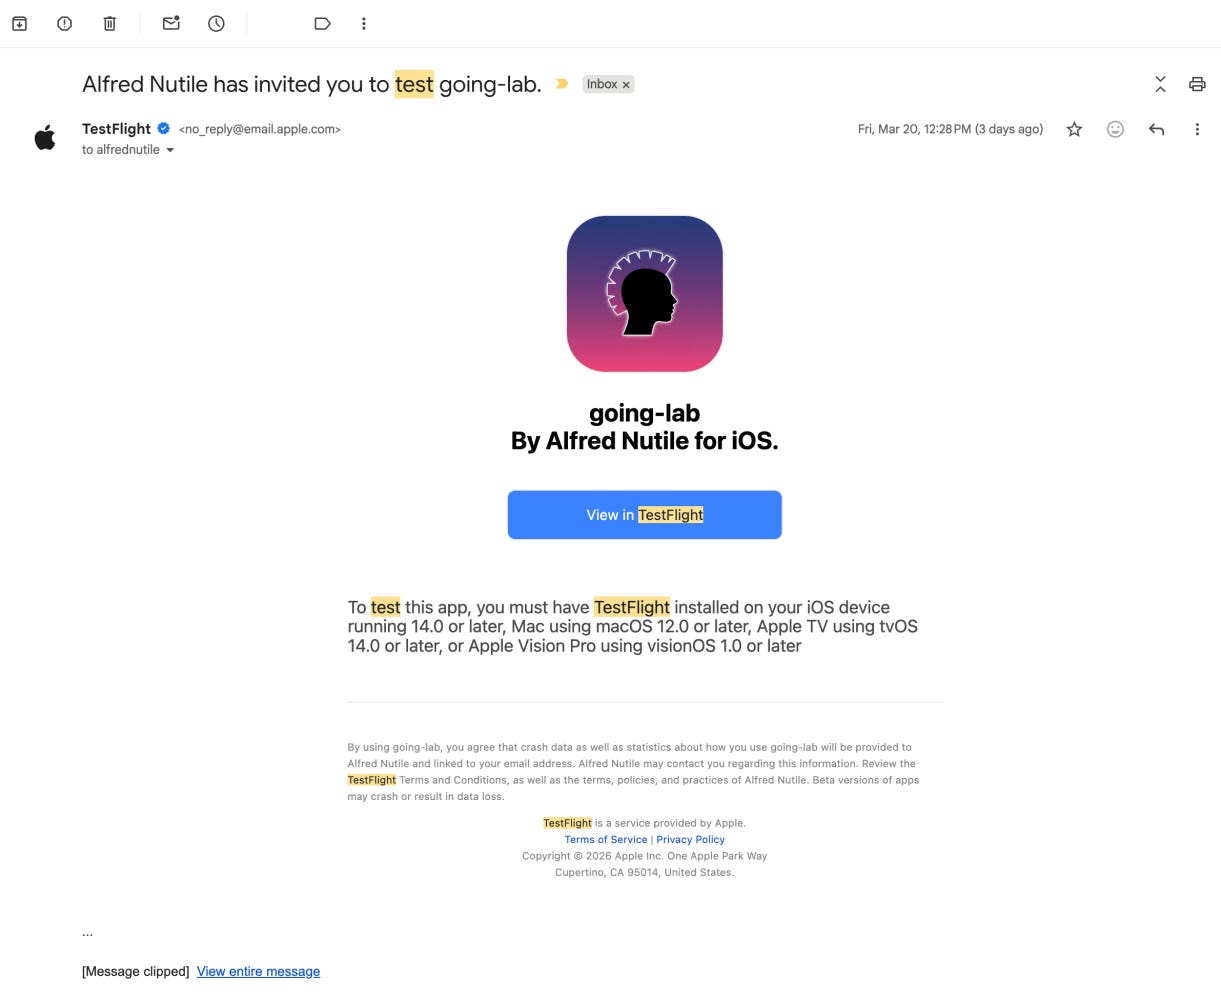
](https://substackcdn.com/image/fetch/$s_!vd2m!,f_auto,q_auto:good,fl_progressive:steep/https%3A%2F%2Fsubstack-post-media.s3.amazonaws.com%2Fpublic%2Fimages%2F56362c8d-0b36-4d4e-94a3-c1a68e29485c_1221x1000.png) You will get a test flight email like this
And that’s it. You now have a real app on your iPhone. You can use it like any normal app. You can invite others on your team to the TestFlight so they can do the same. I think the TestFlight period is about 30 days before you need to renew, but it’s not a big deal — you just push an update and it refreshes. You can really run this app for a while in the office on a private setup.
If you want to go further and actually publish to the App Store, you’re already there. You’d submit it for review and hope Apple doesn’t reject it — which does happen. They have a lot of rules. But AI can help you understand those rules and avoid breaking them.
Wrapping It Up
Honestly, that was it. That’s how easy it was to go from a prompt to a real app. I could never have done this before — and I’ve built three different iOS apps. They’ve all been a pain, mostly not because of the code, but because of the Apple process. To make it this easy is just mind-blowing.
I keep thinking about businesses that want an internal app — to update a workflow, to take photos of something and process the data, to turn a photo of a document into data in their database. Or when someone’s on-site and needs to take a bunch of photos and notes at a job, and the app just takes it all in and puts it into their system. Those optimizations are huge.
If you’re thinking about how to use AI technology in your business, seriously consider this. I hope you enjoyed the article. Click the link to support the channel or my writing — SuperApp is a sponsor. Thank you.
Give it a go 👉 bit.ly/dailyai-superapp